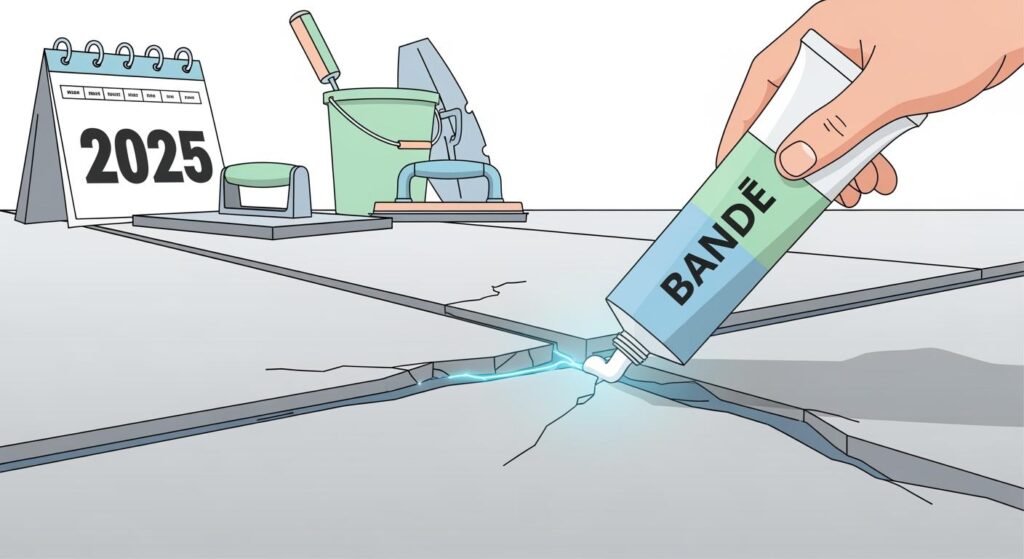

Unsightly concrete cracks on your concrete driveway are frustrating. Good news: you can achieve effective cement crack repair in 2025! DIY concrete crack repair costs as little as £5, a budget-friendly option versus professional fixes up to £1,000. This guide shows you how to repair cracks using BANDě, a durable solution for your concrete. You will master crack types, preparation, and advanced concrete materials for a flawless driveway.
Key Takeaways
Understand your concrete cracks first. This helps you choose the right repair method. Look for hairline, shrinkage, or structural cracks to decide if you can fix them yourself.
Use BANDě for strong concrete repairs. Clean the crack well, widen it, and use backer rods for big gaps. Apply BANDě carefully for a smooth, lasting fix.
Protect your driveway after repair. Apply a sealant and ensure good drainage. This stops new cracks and keeps your driveway looking good for a long time.
Diagnosing Your Cracked Concrete for Effective Repair
You need to understand why your concrete driveway cracks before you can fix it. This helps you choose the best repair method.
Why Do Concrete Driveways Crack? Common Causes
Your concrete driveway can develop cracks for several reasons. Weather changes and soil movement are common culprits. Water infiltration is a big problem. Cracks allow water to seep in, which leads to erosion and more damage. In colder months, water freezing in these cracks causes expansion. This worsens the problem. UV exposure and other environmental factors can also diminish the appearance of your concrete. Fluctuating weather conditions, like those in Surrey with wet winters and dry summers, can make cracks worse over time.
Identifying Crack Types: Hairline, Shrinkage, Structural
You will see different types of cracks. Hairline cracks are thin and shallow. They often develop because concrete shrinks during the curing process. As concrete cures, it loses water from its pores. This shrinkage creates stress within the concrete. This leads to cracks forming as the material contracts. Plastic shrinkage cracks can also appear shortly after pouring, especially in hot, dry conditions. These happen due to rapid moisture loss. Structural cracks are more serious. They indicate deeper issues with the concrete’s foundation.
Assessing Crack Severity: DIY or Professional Fix
You must assess the crack severity. This helps you decide if you can fix cracked concrete yourself. Consider the depth of the cracks, surface evenness, and any signs of crumbling or chipping. Wide gaps or sunken areas may indicate structural problems. Serious issues, like multiple sinking slabs or wide structural cracks, need professional intervention. Attempting DIY fixes on significant structural problems can worsen the damage. If your concrete driveway shows significant damage, you should consult a professional.
Tools & Materials for 2025 Cement Crack Repair: Featuring BANDě
You need the right tools and materials for effective cement crack repair. Gather these items before you begin your project. This ensures a smooth and successful repair of your concrete.
Essential Tools for Concrete Crack Repair
First, let’s look at the tools you will need. You should have a sturdy wire brush. This helps you clean out any dirt, loose bits, and debris from the concrete crack. A chisel and hammer are useful for widening and undercutting the crack. This creates a better surface for the sealant to adhere to. You will also need a utility knife. This helps you trim backer rods to the correct size. Of course, a reliable caulk gun is essential for applying BANDě smoothly and evenly.
Safety is very important when you work with concrete. Always protect yourself from dust and debris. You should wear appropriate safety gear. This includes:
Safety glasses
Gloves
Sturdy boots
These items keep you safe as you prepare your concrete for repair.
Introducing BANDě: The Durable Repair Solution
Now, let’s talk about the star of your concrete repair project: BANDě. This isn’t just any sealant; it’s a leading solution for durable and long-lasting repairs. BANDě is a flexible, polyurethane-based sealant. It sets fast and penetrates deep into the concrete crack. This ensures a strong bond and a lasting fix. You will find BANDě ideal for many types of concrete repairs, offering excellent durability. It makes your cement crack repair job much easier and more effective.
Complementary Materials: Backer Rods & Sealants
Beyond BANDě, you will need a few other materials to achieve a professional finish for your concrete. For wider gaps, you should use backer rods. These foam rods fit into the crack before you apply the sealant. Backer rods can be utilised for deeper cracks to enhance the effectiveness of sealing. They help control the depth of the sealant and save material. Next, you need a good concrete cleaner. Proper cleaning is crucial for adhesion.
One user reported achieving the ‘best result’ when they first cleaned the roof with ‘No Nonsense Degreaser’ using a plant sprayer and then hosed it off, before applying an acrylic roof repair compound. This suggests that ‘No Nonsense Degreaser’ is an effective cleaner for preparing surfaces before sealant application.
So, consider a degreaser like ‘No Nonsense Degreaser’ to thoroughly clean your concrete. You might also want some fine sand. This helps blend the repair with your existing concrete for a seamless look. Finally, for any minor holes or surface imperfections, a concrete patching compound can be very useful. This compound helps you achieve a smooth surface before the final filling and sealing. This ensures a complete and tidy patching job.
Step-by-Step: How to Repair Cracks with BANDě
You are now ready to tackle those unsightly cracks. Follow these steps carefully for a successful cement crack repair. This repair method will give you a durable, long-lasting finish.
Step 1: Thorough Crack Cleaning & Preparation
First, you need to prepare the area. This is a crucial part of any concrete repair. Start by cleaning the crack thoroughly. You must remove any debris. Use a wire brush or a broom to get rid of loose debris. For tougher material, a pressure washer works wonders. Make sure you remove any soft or crumbling concrete. This creates a solid base for your repair. Proper cleaning and preparing ensures the BANDě adheres well.
Step 2: Widening & Undercutting for Adhesion
Next, you will prepare the crack for better adhesion. Remove any loose concrete, dirt, or debris from the crack using your wire brush. Then, widen the crack slightly. This helps the sealant stick better. Use a chisel and hammer to undercut the crack edges. You want to create an inverted “V” shape. This shape locks the sealant in place. After widening, rinse the area with water. This removes any dust. Allow the concrete to dry completely before moving on.
Step 3: Inserting Backer Rods for Wider Gaps
For wider cracks, backer rods are your best friend. These foam rods help control the depth of the sealant. They also save you material. Choose a backer rod slightly larger than the crack’s width. This ensures a snug fit. Gently push the backer rod into the crack. Use a utility knife to trim it if needed. The rod should sit about 6mm below the surface of the concrete. This leaves enough space for the BANDě.
Step 4: Applying BANDě for a Seamless Finish
Now it is time to apply BANDě. Load your BANDě cartridge into the caulk gun. Cut the tip of the nozzle at an angle. Make sure the opening matches the width of your crack. Apply the BANDě steadily into the crack. Ensure it fully penetrates and fills the gap. Work slowly and evenly. You want to avoid air bubbles. For a seamless appearance, you can sprinkle fine sand over the wet sealant. Then, gently press it in. This helps the patching blend with your existing concrete.
Step 5: Curing & Finishing for Longevity
The final step is curing and finishing. BANDě needs time to cure properly. This ensures its durability. Check the product instructions for specific curing times. Avoid putting any weight or traffic on the repaired area during this period. Once cured, you will have a strong, flexible repair. This patching will protect your concrete for years. You have now completed the filling and sealing process. Enjoy your improved driveway!
Post-Repair Care & Prevention for Flawless Driveways
Protecting Your Repaired Driveway: Sealing & Maintenance
After repairing your concrete, you need to protect your investment. Applying a protective sealant is crucial. For non-imprinted concrete, you can choose PU 1K for high durability, water-based acrylic for low odour, or solvent-based acrylic for an enriched finish. Acrylic sealants are a water-based option. They provide a protective coating to your driveway. They are flexible, allowing the pavement to expand and contract without cracking. Acrylic and polyurethane sealers work well for driveways in the UK climate. You should reseal your concrete every 3 to 5 years. This frequency depends on factors like climate and traffic. Always inspect your protective sealant for any signs of wear.
Preventing Future Cracks: Best Practices
You can prevent future cracks by focusing on proper drainage. Addressing drainage during installation protects your investment. It extends your concrete’s lifespan by decades. Look for signs of poor drainage. These include persistent puddles, cracks near edges, or settling areas. Proper site preparation is key. This involves assessing soil type and ensuring a stable ground. Professional installation techniques prevent uneven surfaces. Planning for adequate drainage systems directs water away from your concrete. Consider permeable concrete. It facilitates natural water absorption. This helps prevent future cracks.
When to Consider Professional Intervention for Cracked Concrete
Sometimes, a DIY fix is not enough. You should consider professional intervention for your concrete driveway. Look for multiple warning signs simultaneously. These include widespread cracking, pooling water, uneven surfaces, or crumbling edges. Wide or deep cracks are a significant red flag. They often signal a shifted foundation. Patching these is only a temporary solution. Uneven or sunken areas also indicate shifting. These pose trip hazards. Visible cracks, like linear or alligator patterns, can worsen quickly. Early professional intervention prevents minor issues from escalating.
You can achieve effective cement crack repair on your concrete driveway in 2025. Remember, proper diagnosis, preparation, and using quality materials like BANDě are key. Enjoy enhanced curb appeal and a longer-lasting driveway. Go on, confidently tackle those repairs! You will have a flawless driveway for years to come with BANDě.
FAQ
How long does BANDě take to cure?
BANDě usually cures within 24 hours. You should always check the product instructions for exact timings. Keep traffic off the area during this period.
Can I paint over BANDě after it cures?
Yes, you can paint over cured BANDě. Make sure the sealant is completely dry first. This helps achieve a seamless finish.
Is BANDě suitable for vertical concrete surfaces?
Absolutely! BANDě works well on vertical concrete. Its strong adhesion makes it perfect for walls and steps too.
See Also
Selecting The Optimal BANDě Concrete Sealer: Your 2025 Comprehensive Handbook
Choosing The Ideal BANDě Cementitious Crack Sealer For Your Project Needs
The 2025 Handbook: Selecting Perfect Concrete Densifiers, Hardeners, And Sealers
A 2025 Guide: Selecting The Finest Cementitious Repair Mortar Solutions
Achieving Durable Repairs: Your Ultimate Guide To Mastering Cement Crack Sealers