
Prioritize waterproofing concrete structures. This ensures long-term protection and structural integrity. Untreated concrete surfaces suffer water damage, moisture infiltration, dusting, and freeze-thaw damage. Effective waterproofing prevents constant maintenance. A moisture proofing agent provides critical waterproofing for your concrete, offering lasting protection against water damage and enhancing concrete integrity. This waterproofing stops water infiltration on your surface.
Key Takeaways
Prepare concrete surfaces well before applying moisture proofing agents. Clean, repair, and ensure the surface is dry. This helps the agent stick better.
Choose the right moisture proofing agent for your concrete. Apply it carefully and evenly. This creates a strong barrier against water.
Allow enough time for the moisture proofing agent to dry and cure. This makes the concrete strong and durable. It protects against water damage for a long time.
Concrete Surface Preparation for Moisture Proofing
Before you apply any moisture-proofing agent, you must prepare the concrete surface. Proper concrete surface preparation is crucial for effective waterproofing. A clean, dry, and structurally sound surface ensures the agent bonds correctly. This step directly impacts the long-term integrity and performance of your waterproofing efforts.
Evaluate Concrete Surface Condition
First, you need to thoroughly inspect your concrete surface. Look for any existing damage, such as cracks, spalling, or areas with efflorescence. Understanding the current condition helps you plan your preparation steps. This initial assessment is vital for successful waterproofing.
Clean and Degrease Concrete Surfaces
Next, you must clean and degrease the concrete surface. Remove all dust, dirt, loose particles, and contaminants. These can prevent proper adhesion of your moisture-proofing agent. For effective degreasing, you can use products like Concrete Coatings EZ-Prep Pro Degreaser and Cleaner.
Here are some recommended methods for cleaning your concrete:
General Concrete Cleaning:
Dilute EZ-Prep Pro 2:1 with water.
Dampen the concrete with water.
Apply the diluted product evenly using an acid-resistant pump-up sprayer.
While the surface is wet, rub the concrete with a stiff bristle broom.
Rinse with a garden hose or power wash before the product dries.
Surface Preparation on Exterior Concrete:
Dilute EZ-Prep Pro 2:1 with water.
Dampen the concrete with water.
Apply the diluted product evenly using an acid-resistant pump-up sprayer.
While the surface is wet, rub the concrete with a stiff bristle broom.
Power wash with a minimum 3,000 PSI pressure washer equipped with a turbo-tip before the product dries.
Surface Preparation on Interior Concrete:
Dilute EZ-Prep Pro 2:1 with water.
Dampen the concrete with water.
Apply the diluted product evenly using an acid-resistant pump-up sprayer.
While the surface is wet, rub the concrete with a black pad on a rotational floor machine.
Keep the floor wet with frequent rinsing.
Mop residue until the rinse water is clear or use water extraction equipment.
Remember, stronger dilution rates might be necessary for adequate profiling. For power-troweled concrete, you might need to use EZ-Prep Pro straight. Sometimes, mechanical surface preparation, like grinding or shot blasting, is also necessary. This thorough cleaning ensures optimal adhesion for your waterproofing product.
Repair Cracks and Imperfections
After cleaning, you need to repair any cracks or imperfections on the concrete surface. Addressing these issues maintains the structural integrity of your concrete structures. Common imperfections include:
Cracks: These come from shrinkage, settling, or freeze-thaw cycles. You clean them, fill them with epoxy or polymer-based filler, and then smooth them.
Spalling: This is chipping or flaking due to harsh weather or deicing chemicals. You remove damaged sections and apply a new concrete overlay.
Pitting: These are surface imperfections, often in older concrete. You fill them with a patching compound and smooth them.
Efflorescence: These are white, powdery deposits from water evaporation. You remove them with a stiff brush. Then you address the water infiltration to prevent them.
For hairline cracks, several effective repair materials exist:
Hairline Crack Fill Mix / Accent Enhancer: This is a heavily polymerized concrete hairline crack filler. It fills, fixes, patches, and repairs hairline surface cracks. These cracks appear due to drying, curing, settling, aging, or concrete movement. It offers warranted bond ability, abrasion resistance, and moisture tolerance. You can easily apply it with a cellulose sponge.
Low viscosity polyurethane: This material easily enters even hairline cracks without drilling or chiseling. Polyurethane foam has a closed-cell structure. It stops basement water leaks and prevents water from working its way through the crack. It forms a strong bond to the foundation concrete. It entirely fills the crack, from bottom to top and across the entire width of the wall.
CrackWeld® Concrete Floor Repair Kits: This is a low-viscosity, two-part polyurethane crack filler. It penetrates deep and forms a high-strength, structural bond. It cures stronger than concrete. It prevents cracks from widening. It requires no grinding or chiseling. This is ideal for hairline cracks, shrinkage cracks, crazing, and narrow settling cracks (<1/4″) in slabs.
Rapid Patch® Hairline Crack Repair: This is a two-component, low-viscosity, 100% solids, urethane repair product. It fills cracks in structural materials like concrete and bricks for bonding and sealing. It goes on black and dries gray. It suits narrow cracks up to ¼ inch (6 mm) wide and 6 inches (150 mm) deep.
Effective concrete crack repair materials bond strongly. They allow for movement when needed. They also hold up against moisture, weather, and wear. Specialized products offer long-term performance over quick cosmetic fixes. These products penetrate deeply and bond with existing concrete. They remain flexible or semi-rigid to tolerate expansion and contraction. They provide waterproofing and long-term strength. They also blend aesthetically.
Ensure Proper Surface Profile
Achieving the correct surface profile is essential for optimal adhesion of your moisture-proofing agent. The Concrete Surface Profile (CSP) rating indicates the roughness of the surface. Different applications require different CSP levels.
Here are some common CSP levels and their applications:
CSP Level | Application Type |
|---|---|
CSP 1-2 | Thin mil coatings (up to 10 mils) |
CSP 3-5 | Self-leveling resinous or cement-based mortar |
CSP 6-10 | Conventional concrete overlay |
For thin coatings and sealers, you typically need CSP 1-3. Thicker coatings or overlays require CSP 4-6. High-build systems, like polymer overlays, need CSP 7-9.
You can achieve specific concrete surface profiles using various tools and techniques:
Grinding: This is best for CSP 2. It is ideal for sealers and polish.
Shotblasting: This is effective for CSP 3-6. You often use it before applying epoxy.
Scarifying: This generates CSP 4-9. The result depends on the blade type and depth.
Scabbling or Milling: These produce very rough profiles (CSP 7-10). They are for overlays or major restoration.
For coatings under 10 mils, you might use etching or grinding. For 10-40 mils, shot blasting is common. For over 40 mils, scarifying is often the choice. Proper surface preparation ensures maximum adhesion for your waterproofing product.
Verify Optimal Moisture Content
Finally, you must verify the optimal moisture content of the concrete. The concrete must be surface dry. It needs sufficiently low moisture for proper adhesion. A new concrete slab is usually dry enough for floor coverings or coatings when its moisture content is between 3.5% and 4.5%. In most ambient conditions, 4.5% moisture content is considered dry enough for new, clean concrete. For drier ambient conditions, 4% concrete moisture content is dry. In desert-like conditions, 3.5% moisture content is generally accepted as dry.
Be aware that moisture meters have limitations for assessing concrete moisture content in waterproofing applications. While they provide instant results without drilling, their impedance readings can be affected by changes in concrete composition or nearby rebar. These meters primarily measure moisture near the surface, typically down to ¾–1 inch. This means higher moisture levels deeper within the slab may go undetected. ASTM F2659 recommends using these meters as a comparative tool. They help identify areas of relatively high moisture. However, they are not for absolute quantitative measurements. More in-depth tests, like F1869 or F2170, are needed for quantifying moisture and equilibrium within the slab. Surface-based moisture testing methods are unreliable for understanding the overall moisture distribution in a drying slab. Moisture levels tend to be higher at the bottom and equilibrate once sealed. Therefore, any test method that does not measure below the surface cannot provide a complete picture of future moisture levels after flooring installation. This crucial step in preparation ensures the long-term integrity of your waterproofing.
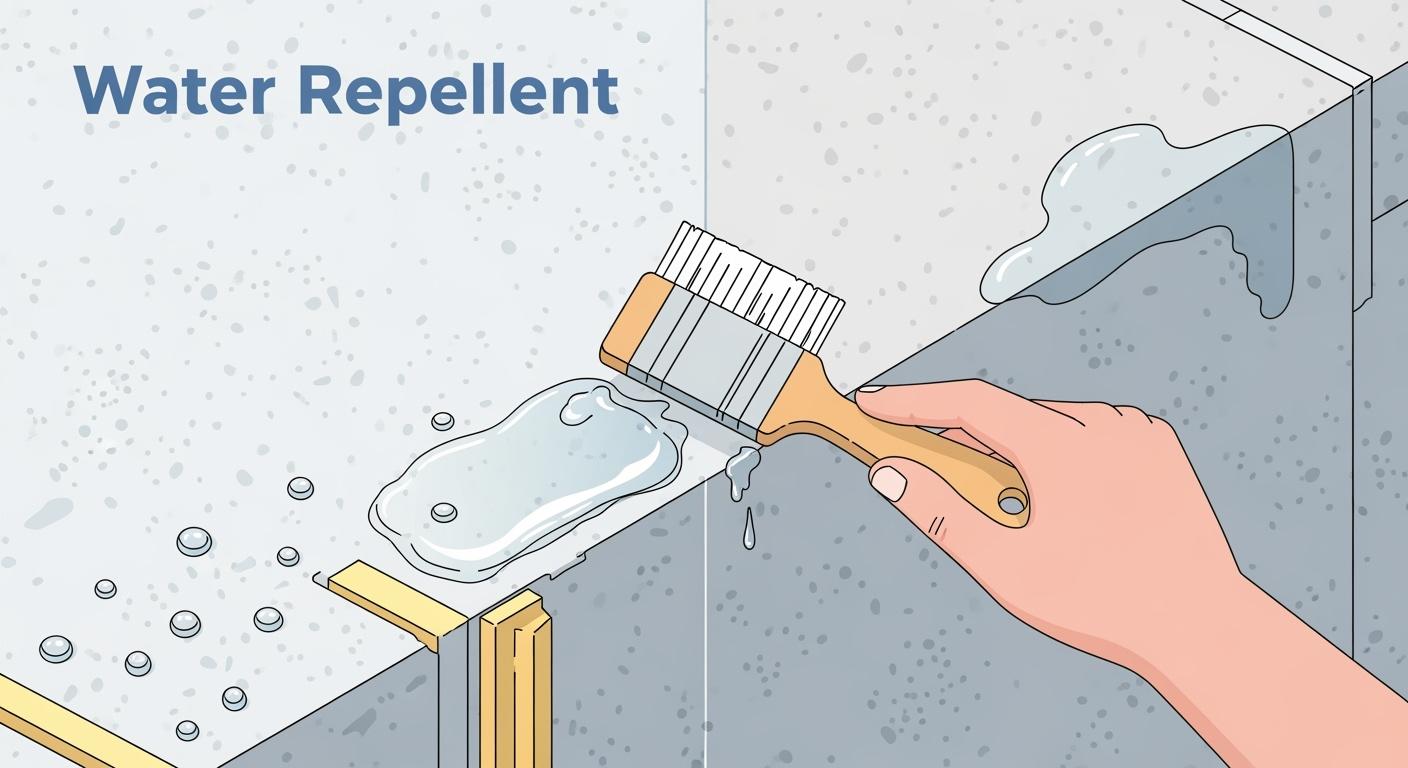
Effective Waterproofing Application for Concrete Structures
Now that you have prepared your concrete surface, it’s time to apply the moisture proofing agent. This step is crucial for creating robust waterproofing concrete structures. Proper application ensures the longevity and effectiveness of your waterproofing efforts, providing lasting protection against water infiltration.
Select the Right Moisture Proofing Agent
Choosing the correct moisture proofing agent is the first critical decision. Different concrete structures and environmental conditions call for different waterproofing solutions. You have several types to consider, each with unique properties and application methods.
Feature | Cementitious Waterproofing | Bituminous Waterproofing | Liquid Applied Waterproofing | Sheet Membrane Waterproofing |
|---|---|---|---|---|
Application | Applied as a slurry, mortar, or render | Applied as a hot or cold liquid, or as pre-formed sheets | Applied as a liquid, forming a seamless membrane | Applied as pre-formed sheets, typically self-adhesive or torch-applied |
Substrate Adhesion | Excellent adhesion to concrete and masonry substrates | Good adhesion to various substrates, but can be affected by surface preparation | Excellent adhesion to various substrates, forming a monolithic bond | Good adhesion, but requires proper surface preparation and detailing at overlaps |
Flexibility | Limited flexibility, prone to cracking with substrate movement | Good flexibility, can bridge minor cracks | Excellent flexibility, can accommodate significant substrate movement | Good flexibility, but depends on the type of membrane and installation |
Breathability | Breathable, allowing moisture vapor to escape | Non-breathable, can trap moisture | Breathable or non-breathable, depending on the product | Non-breathable, can trap moisture |
UV Resistance | Good UV resistance, suitable for exposed applications | Poor UV resistance, requires protection from sunlight | Good to excellent UV resistance, depending on the product | Good UV resistance, but some types may require protective coatings |
Chemical Resistance | Good chemical resistance to various chemicals | Limited chemical resistance, can be affected by solvents and oils | Good to excellent chemical resistance, depending on the product | Good chemical resistance, but depends on the type of membrane |
Durability | Durable and long-lasting in various environments | Moderate durability, can degrade over time with exposure to elements | Durable and long-lasting, with proper application and maintenance | Durable and long-lasting, with proper installation and protection |
Cost | Generally cost-effective | Moderate to high cost, depending on the type and application method | Moderate to high cost, depending on the product and application | High cost, due to material and installation complexity |
Typical Uses | Basements, swimming pools, water tanks, bathrooms, foundations | Roofs, foundations, bridge decks, parking garages | Roofs, balconies, wet areas, intricate architectural details | Roofs, foundations, tunnels, plaza decks |
Advantages | Easy to apply, good adhesion, breathable, cost-effective | Good waterproofing properties, widely available, relatively easy to repair | Seamless, highly flexible, excellent adhesion, good chemical resistance | High tensile strength, puncture resistance, consistent thickness, quick installation |
Disadvantages | Limited flexibility, can crack with movement, requires curing time | Poor UV resistance, can become brittle with age, strong odor during application | Requires skilled applicators, surface preparation is critical, curing time | High material cost, complex detailing, susceptible to damage during installation, limited breathability |
Cementitious Waterproofing: You apply these as a slurry, mortar, or render. They offer excellent adhesion to concrete and masonry. They are breathable, allowing moisture vapor to escape, which is great for basements and foundations. However, they have limited flexibility.
Crystalline-Based Products: These agents penetrate the concrete, reacting with moisture and free lime to form crystals that block water infiltration. They are excellent for damp-proofing unsealed slabs and provide deep protection.
Liquid Membranes: You apply these as a liquid, forming a seamless, highly flexible membrane. They offer excellent adhesion and can accommodate significant movement in the concrete. They are ideal for roofs, balconies, and intricate details.
Your choice depends on the specific needs of your concrete structures, the level of protection required, and the expected exposure to moisture.
Essential Tools for Application
Having the right tools makes a big difference in achieving effective waterproofing. The tools you need will vary based on the type of waterproofing materials you choose.
For liquid membranes, you will typically use:
Sprayers: You can use a handheld “pump-up” sprayer or an airless industrial sprayer. These are great for covering large areas quickly and evenly.
Rollers: A ¾” (19.1 mm) nap roller works well for applying liquid membranes directly from the container.
Brushes: Use brushes for detailed work, edges, and smaller areas where rollers or sprayers might be too cumbersome.
When using sprayers, remember to apply the product uniformly. Do not apply a thicker film than suggested coverage rates allow. Heavy or uneven application can lead to slow dissipation, difficult removal, and potential concrete discoloration. For optimal results, use an airless spray gun, roller, or brush to apply the mixture.
Step-by-Step Application Techniques
Applying your chosen moisture proofing agent correctly is key to its performance and the overall protection of your concrete.
Cementitious Waterproofing
For cementitious waterproofing, follow these steps for proper mixing and application:
Mixing: If you are using a 2K (two-component) system, pour the liquid polymer first. Then, gradually add the cementitious powder. This prevents lumps and ensures a smooth, homogeneous mix. For a 1K (one-component) system, mix the cementitious powder directly with clean water in the recommended ratio.
Mechanical Mixing: Use a slow-speed mechanical mixer (300-500 RPM) with a paddle attachment. Mix for 3–5 minutes until you get a smooth, lump-free consistency. Avoid hand mixing, as it can introduce air pockets.
Maturation: If the manufacturer recommends it, let the mixture rest for 5-10 minutes. This allows air bubbles to escape. Gently remix before application without adding extra water.
Pot Life: Use the mixture within its pot life, typically 30–60 minutes at 25°C. Only mix what you can apply within this time.
Surface Dampening: Dampen the surface to a saturated surface dry (SSD) condition before applying the compound. This prevents the substrate from absorbing moisture and ensures strong adhesion.
First Coat Application: Apply the first coat using a brush (for walls, joints, corners), roller (for large surfaces), or trowel (for thicker applications). Work in one direction (horizontal or vertical) for uniform coverage.
Critical Areas: Focus on critical areas like wall-floor junctions, pipe penetrations, and construction joints. Apply extra material and embed reinforcing mesh for additional strength.
Thickness: Ensure a minimum thickness of 1–2 mm per coat. Use a notched trowel or wet-film gauge for verification.
Pressing Material: Use a stiff brush or roller to firmly press the material into the surface. This eliminates trapped air and smooths out pinholes.
Curing First Coat: Allow the first coat to cure for 4-6 hours (or as specified) before applying the second layer. Protect the surface from direct sun, wind, or rain.
Second Coat Application: Apply the second coat in a perpendicular direction to the previous layer for good bond and coverage. If the first coat was exposed for a long time, wash the surface with water before applying the second coat to ensure a dust-free surface.
Smooth Finish: To achieve a smooth finish, trowel the surface immediately after brushing the second coat.
Full Curing: Allow 4-7 days for full curing after applying the second coat before water immersion. This depends on ventilation and ambient temperature.
Crystalline Products
Crystalline moisture-proofing agents work by forming crystals within the concrete. For deep penetration, you can apply them topically or as an integral admixture. When you add them directly to the concrete mix, they lead to uniform crystalline formation throughout the entire volume of the concrete. For topical applications, proper surface preparation is vital. The concrete surface must have an open pore texture to allow the reactive chemicals to diffuse into the substrate. It needs to be clean and free of contaminants like form oil or laitance. Ensuring correct substrate saturation, coverage rate, and curing time is essential for successful application. This method provides excellent damp-proofing for unsealed slabs and enhances the overall waterproofing of your concrete structures.
Liquid Membranes
For liquid membranes, you need even application. Use a brush, roller, or spray equipment. Ensure uniform coverage, especially in critical areas. For spray application, follow the start-up procedure for airless spray equipment. Apply the first coat and the second in the opposite direction using the cross-hatch technique. Each coat should typically be 1.5 mm to 3 mm thick. Apply the mixture as a base coat on the primed surface at a rate of 0.4 – 0.5 Kg/m². Apply a second coat at the same coverage after a 4-6 hour interval. Additional coats may be applied for higher thickness. Highly porous surfaces may require two coats of primer.
Achieve Uniform Coverage and Penetration
Uniform coverage and proper penetration are non-negotiable for effective waterproofing. Inconsistent thickness can lead to weak spots and compromise the protection of your concrete structures.
Thickness Matters: Elastic membranes bridge cracks by deforming and elongating. Insufficient thickness risks membrane continuity. Irregular substrates like concrete require adequate membrane thickness to cover all irregularities, unless you perform extensive surface preparation. Protective membranes act as barriers against water, chemicals, and gases, with isolation capacities directly linked to applied thickness.
Application Techniques:
Apply the spray gun perpendicular to the substrate.
Utilize overlapping spray patterns.
Employ ‘cross patterns’ during application to ensure uniform, full coverage and minimize pinholes.
Verify all coating thicknesses using a wet-film mil gauge.
Wet Mil Gauges: These are vital tools for measuring the thickness of freshly applied liquid membranes. They allow you to quickly determine film thickness and make immediate adjustments before curing. Applying too thin can lead to non-continuous films, weak spots, pinholes, and compromised barrier integrity. Applying too thick can result in uneven curing, soft spots, longer drying times, reduced yield, and increased costs. Your goal is a consistent, uniform, monolithic layer applied according to manufacturer specifications for optimal performance.
Preventing Errors: To prevent applicator errors and ensure consistent results:
Thoroughly clean surfaces to remove contaminants like dirt, dust, and grease. These can hinder proper adhesion of waterproofing materials.
Repair all surface defects such as cracks, holes, and uneven areas before application. This prevents poor adhesion and vulnerability to water infiltration.
Apply a suitable primer to enhance adhesion between the surface and the waterproofing material. This creates a stable base and improves bonding strength.
Ensure consistent coating thickness during application to avoid weak points prone to water penetration and differential curing issues.
Adhere strictly to the manufacturer’s specified curing times for the waterproofing material. This achieves optimal performance and prevents compromise of effectiveness.
Follow all manufacturer’s instructions for the specific waterproofing product. This ensures desired performance, good adhesion, and durability.
Provide proper training for all applicators on material use, techniques, uniform application, correct curing times, and adherence to manufacturer guidelines.
Utilize recommended tools and equipment that are clean and suitable for the specific waterproofing material. This ensures consistent and effective results.
Understand Drying and Curing Times
Drying and curing are distinct but equally important phases. Drying refers to the evaporation of solvents or water from the surface, while curing involves chemical reactions that harden the material and give it its final properties.
For concrete, proper curing involves maintaining adequate moisture, temperature, and environmental conditions. This ensures optimal hydration and strength development. Ideal curing temperatures for concrete are between 50°F and 60°F, with internal humidity levels above 80–85%. Maintaining these conditions prevents premature drying, cracking, and surface defects. These are crucial for the concrete’s long-term performance, durability, and resistance to wear, abrasion, freeze-thaw cycles, and chemical intrusion.
Environmental factors significantly impact these times. Temperature, humidity, and airflow are critical. Ideal drying conditions for acrylic paints, for example, are temperatures between 70 to 85°F and humidity below 75%. Temperatures below 49°F can prevent proper film formation, leading to issues like cracking or adhesion failure. While higher temperatures can speed drying, overheating may cause bubbling. High humidity (above 75%) significantly slows down the drying process by hindering water evaporation. Moderate and steady airflow is beneficial for thorough drying, but strong breezes can cause film defects such as cracking or wrinkling.
You can also use curing compounds. These compounds minimize water evaporation by forming a thin film on the concrete surface. This helps maintain the necessary moisture for proper curing, enhancing the overall protection and durability of the concrete.
Multi-Coat Application Strategies
Applying multiple coats of your moisture proofing agent often provides superior protection. This strategy builds up thickness and ensures complete coverage, minimizing the risk of pinholes or missed spots that could lead to water infiltration. For cementitious waterproofing, you typically apply two layers with a trowel or sprayer, ensuring the first coat cures sufficiently before the second. For liquid membranes, applying multiple thin coats in a cross-hatch pattern often yields the best results, allowing each layer to bond effectively and create a robust, seamless barrier. This layered approach significantly enhances the waterproofing capabilities and overall maintenance of your concrete structures.
You now understand how to apply a moisture proofing agent to concrete. This ensures excellent waterproofing for your concrete structures. Proper waterproofing provides long-term effectiveness, enhancing durability and integrity. You will see reduced maintenance and better protection for your concrete surface. This waterproofing keeps your concrete structures safe from moisture. Good waterproofing is key for your concrete.
FAQ
What causes water infiltration in concrete?
Water infiltration often happens through cracks or porous areas. Poor drainage around your foundation also contributes to water infiltration. Effective waterproofing prevents this.
How important is drainage for preventing water damage?
Drainage is very important. Proper drainage solutions divert water away from your concrete. This prevents water infiltration and significant water damage. Good drainage protects your waterproofing efforts.
What happens if you don’t use waterproofing agents?
Without waterproofing, you risk severe water damage. Water infiltration leads to structural issues and mold growth. You need proper drainage solutions to avoid costly repairs. This protects your investment.
See Also
Mastering Concrete Waterproofing: Your Definitive Guide to Effective Techniques
Extend Concrete Life: A 2025 Guide to Floor Hardener Application
Selecting Concrete Densifiers, Hardeners, Sealers: Your Complete Buying Guide
Choosing the Optimal Concrete Protective Sealer: An Essential Project Guide
Selecting the Ideal Concrete Dustproofer for Your Specific Project Needs