
Unpredictable weather patterns make proactive home protection against basement flood damage essential. Approximately 98% of basements experience water damage, costing an average of $3,780 per flood incident. This guide offers practical, up-to-date (2025) DIY flood-resistant design strategies. It combines structural integrity, water diversion, and material resilience for lasting peace of mind in a changing climate.
Key Takeaways
Understand your basement’s flood risks. Look for signs like cracks or dampness. This helps you choose the right protection.
Seal your basement walls and floors. Use materials like hydraulic cement for leaks. This stops water from getting in.
Improve your home’s exterior. Make sure your yard slopes away from the house. Keep gutters clean. This directs water away from your basement.
Understanding Flood Risk and 2025 Resilient Design Principles
Homeowners must understand flood risk and embrace modern resilient design principles. This approach helps protect buildings from increasing weather extremes. The ASCE/SEI 24-2025 standards and FEMA guidelines offer a strong framework for flood-resilient design. These principles focus on preventing moisture intrusion, selecting smart materials, and protecting utility systems. They apply directly to DIY basement fortification, helping homeowners achieve long-term resilience against natural disasters. Future-proofing buildings means adopting these strategies now. This is especially true for coastal areas facing more intense hurricane and storm activity.
Assessing Your Basement’s Flood Vulnerabilities
Understanding what makes a basement vulnerable is the first step in effective flood protection. Many factors contribute to basement flooding. Poor exterior drainage often causes water to pool near the foundation. This happens when downspouts are too close to the home or landscaping slopes towards the house. Hairline cracks in concrete foundation walls also allow rainwater to seep through. A failed sump pump, due to power outages or mechanical issues, cannot remove water effectively. Clogged or broken gutters cause water to cascade down the house, increasing hydrostatic pressure around the foundation. Sewer backups can occur during heavy rain, pushing wastewater into basements. Hydrostatic pressure forces water through basement walls and floors when soil becomes saturated. Basement window wells can also fill with water during heavy rain, leading to leaks through window frames. These issues highlight the need for a comprehensive flood design.
Several indicators point to a basement’s vulnerability to water intrusion. An increase in insects like centipedes or silverfish, along with rodent droppings, suggests damp conditions. Flaking or peeling paint and white, powdery residue (efflorescence) on walls signal ongoing moisture migration. Cracks in basement walls or floors often develop from concrete stress due to water pressure. Bowed or bulging basement walls indicate shifted forces from water saturation. Spalling or deteriorating concrete points to a loss of integrity in flooring or walls. Cracks in the foundation structure, uneven floors, or gaps between the foundation and walls also suggest instability. Doors and windows that stick can signal structural shifts. Water stains, peeling paint, bubbling wallpaper, and persistent musty odors all indicate moisture problems. Noticeable damp surfaces and condensation on pipes or windows, along with unusually high humidity, further confirm a need for better flood protection. These signs are critical for homeowners in coastal regions, where hurricane and storm surges pose significant threats to buildings.
Dry Floodproofing: Sealing for Flood Protection
Dry floodproofing aims to prevent water from entering a basement entirely. This involves creating a watertight envelope around the structure. It is a key strategy for enhancing the resilience of buildings. Homeowners can implement various flood barriers and sealing techniques.
When sealing basement walls and floors, material selection is crucial.
Surface Type Suitability | Moisture Level Suitability | Cost (per sq ft) | Longevity/Performance | |
|---|---|---|---|---|
Silicate Sealers | Porous concrete | High humidity/active water intrusion (allows vapor transmission) | $5-$7 | Superior |
Epoxy Sealers | Dense or previously sealed surfaces | Moderate moisture conditions | $5-$7 | Superior |
Acrylic Sealers | Primarily dry basements with minimal moisture concerns | Minimal moisture concerns | $1-$6 | Economical, requires frequent reapplication |
Sodium Bentonite | Exterior applications | N/A | ~$2 | More affordable for exterior |
Hydraulic Cement | Active water leaks | Active water leaks (expands as it cures) | N/A | Immediate, watertight seals |
Silicone Caulk | Hairline cracks (<1/4 inch) | N/A | N/A | Effective for small cracks |
Waterproofing Paint/Sealant | Entire wall surface (after repairs) | N/A | N/A | Requires 2 coats, covers 75-100 sq ft/gallon |

Homeowners should consider the surface type, moisture levels, and budget when choosing sealers. Silicate sealers work well for porous concrete in high humidity. Epoxy sealers suit dense surfaces in moderate moisture. Acrylic sealers are economical for dry basements.
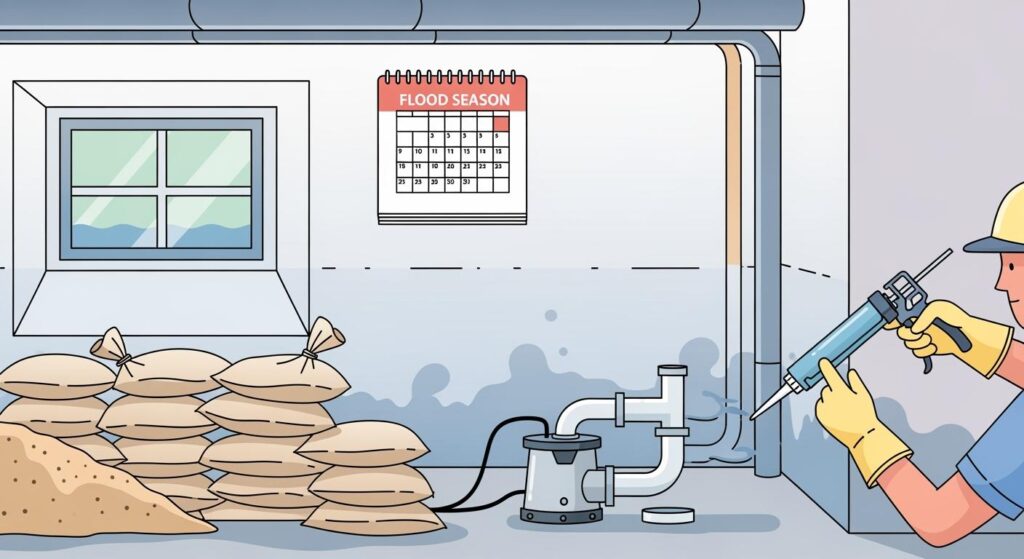
The sealing process involves several steps. First, homeowners must prepare the surface by cleaning damaged areas and removing debris. For hairline cracks, silicone caulk works effectively. For active leaks, hydraulic cement provides immediate, watertight seals. Mix three parts hydraulic cement powder with one part cold water to form a pliable paste. Press it firmly into cracks, holding until it sets. Work in small batches because it sets rapidly. After repairs cure, apply a quality masonry waterproofer to the entire wall surface. Stir thoroughly and apply with a 3/4-inch nap roller or nylon brush, starting from the top in 3-foot sections. Apply a minimum of two coats. Allow 2-3 hours between coats and maintain temperatures above 50°F. Back-brushing helps the waterproofer penetrate concrete pores. These resilient materials and techniques are crucial for flood-resistant protection, especially in coastal areas prone to hurricane and storm surges. They form essential flood barriers, enhancing the integrity of the foundation.
Wet Floodproofing: Managing Flood Impact
Wet floodproofing involves allowing floodwaters to enter and flow through the enclosed areas of a house. This approach primarily relieves pressure on a home during floods, reducing the likelihood of structural damage. It is a critical hurricane-resistant home design principle, especially for buildings in coastal zones.
Managing flood impact within a basement during a flood event involves several strategies. Less expensive options include adding waterproof veneer to the foundation, exterior walls, windows, and doorways to prevent shallow flooding. Sealing basement walls with waterproofing compounds also helps. Using flood-resistant, non-porous flooring materials like tiles instead of carpet, and flood-resistant insulation/sheetrock, especially below the Base Flood Elevation (BFE), offers significant protection. Homeowners can buy sandbags to divert water and use doorway flood barriers. Clearing gutters and ensuring downspouts route water away from the house are simple yet effective measures. Keeping storm drains near the property free from debris and purchasing rain barrels to collect runoff also reduce flash flood risks. Installing flood vents in foundation walls, garages, and other enclosed areas allows water flow and relieves pressure, a key aspect of sustainable design.
More expensive options include elevating the lowest floor of a home above the BFE using stilts or concrete blocks. Elevating or flood-proofing HVAC systems, essential units, electrical systems, and utilities above the BFE provides crucial safety. Building in foundation vents allows water to flow through non-living spaces like basements, equalizing hydrostatic pressure. Installing a sump pump in the basement or crawl space automatically removes accumulating water. An exterior floodwall can protect utilities, window wells, or stairs against low-level flooding. Having a backflow check valve installed on a sewer or storm drain connection prevents backflow. Exploring land grading options, such as swales, directs water away from the home. Anchoring a fuel tank securely with non-corrosive metal supports and fasteners also adds to safety. These hurricane mitigation techniques are vital for maintaining the integrity of buildings in coastal areas during a hurricane or severe storm.
After a flood, health precautions during cleanup are essential. Prevent unnecessary exposure to microorganisms (viruses, bacteria, mold) and cleaning products. Floodwater can bring in microorganisms from sewage, and cleaning products can trigger asthma symptoms. Consult a healthcare provider if you have concerns. Drying a house quickly and safely is also critical. Leave outside doors and windows open if safe, and open inside doors, cabinets, and remove drawers/shelves to allow hidden surfaces to dry. Use fans, dehumidifiers, or heaters to speed up drying, but wait until after gently cleaning visible mold. Do not use an HVAC system for drying if any part was affected by floodwater. Drying can take weeks; keep air moving even after things look dry. Do not seal flooded areas or apply paint/sealants until surfaces are completely dry internally. Cleaning methods should prevent contaminants from becoming airborne. Gently clean surfaces with a cloth dampened with clean water and detergent. After damp cleaning, use a wet/dry vacuum for remaining debris. Apply EPA-registered disinfectants on clean, non-absorbent surfaces. Always read product labels carefully.
Integrated Water Management and Drainage Systems
Effective integrated water management systems are crucial for residential properties. They reduce water waste, lower utility bills, and protect property from water damage. These systems provide data-driven control over water usage, helping homeowners detect leaks and avoid overwatering. They offer economic, environmental, and lifestyle benefits by combining responsive technology with preventative features. This approach aligns with sustainable design principles for buildings.
Water recycling systems, such as harvesting tanks, can reuse water from toilets, showers, washing machines, and roofs for irrigation. Smart water-saving practices, like running full loads in washing machines and turning off taps, significantly reduce daily water consumption. Efficient drainage systems, including sustainable urban drainage systems (SuDS) and soakaways, prevent flood, protect foundation integrity, and preserve water quality. They direct water away from the home and gradually release excess rainfall into the ground.
Smart home technologies also play a role in water management. Leak detection sensors automatically prevent major damage from small leaks. Smart irrigation timers adjust based on weather and soil data, using less water and promoting healthier landscaping. Flow meters track usage in real-time, identifying costly patterns or unnoticed leaks. Remote shut-off valves can be controlled from anywhere, adding protection while homeowners are away. Mobile app integration allows viewing stats, receiving alerts, and remote shut-off, providing real-time data and control. These systems are vital for enhancing the overall resilience and sustainability of buildings, especially in coastal areas facing hurricane and storm threats.
Designing effective basement drainage systems requires careful consideration. Homeowners must assess specific water issues to pinpoint root causes. Understanding various drainage systems, their components, and installation methods is essential. Factors like soil type (clay, loam, or sand) and property slope significantly impact system effectiveness. Selecting correct drainage components, such as drain pipes and sump pumps, requires considering installation depths, foundation size, and expected water volume. Addressing debris accumulation in sumps and drainage pipes prevents leaks and clogs. Evaluating project complexity, including landscape grading, wall sealing, and proper incorporation of drainage systems, helps decide between DIY or professional installation.
The severity of moisture issues dictates the appropriate drainage solution; severe intrusion may require a combination of interior and exterior systems. Soil conditions and their drainage characteristics impact exterior system effectiveness; clay soils, for example, retain water and may need additional measures. Local climate, including precipitation levels, freeze-thaw cycles, and soil saturation, influences design. Cold climates need measures against frost heave and ice buildup. Cost and budget vary with system complexity, labor, and materials; homeowners should weigh upfront investment against long-term benefits. These design considerations are crucial for creating a robust flood protection system and enhancing the overall sustainability of a home against hurricane and storm events.
DIY Projects for Flood-Resistant Basement Protection
Homeowners can take proactive steps to safeguard their basements against water damage. These DIY projects focus on practical, actionable strategies. They combine structural improvements, water diversion, and smart material choices. This approach helps create a truly flood-resistant home. It enhances the overall resilience of buildings against severe weather, including hurricane and storm events common in coastal regions.
Sealing Foundation Cracks and Penetrations
A strong foundation is the first line of defense against basement flooding. Cracks and penetrations in the foundation allow water to seep inside. Addressing these vulnerabilities is crucial for effective protection.
Different types of cracks require specific sealing methods. For vertical or hairline cracks, homeowners can use polyurethane foam or elastomeric caulk. These materials are flexible. They handle minor movement in the foundation. Epoxy injection works best for stair-step or diagonal cracks. It creates a strong structural bond. For active leaks, hydraulic cement provides a quick plug. Then, homeowners can apply a flexible polyurethane sealant. Horizontal cracks often indicate serious structural issues. They require a professional assessment.
Here is a breakdown of common sealants:
Crack Type | Best Sealant | Why It Works |
|---|---|---|
Vertical/Hairline | Polyurethane foam or elastomeric caulk | Flexible, handles minor movement |
Stair-step/Diagonal | Epoxy injection | Strong structural bond |
Active leaks | Hydraulic cement + polyurethane | Quick plug, then flexible seal |
Horizontal cracks | Professional assessment needed | May indicate serious structural issues |
Epoxy injection sealants are two-part systems. They create a rigid bond, often stronger than the concrete itself. This makes them ideal for restoring structural integrity in non-moving cracks. However, their rigidity means they cannot accommodate future foundation movement. Polyurethane foam sealants are flexible. They expand as they cure, filling the entire crack void. They excel at stopping active leaks and sealing cracks that may experience future movement. This creates a durable waterproof seal. Hydraulic cement is a fast-setting material. It expands as it cures. This makes it ideal for plugging active water leaks quickly. However, it is rigid and can crack again with foundation movement. Homeowners should use it as a temporary plug before applying a more flexible sealant. Elastomeric and caulk sealants suit hairline cracks and minor surface gaps. They provide a flexible, waterproof seal without structural reinforcement. These are simple, budget-friendly options for small, non-structural repairs. They should not be used for deep or structural cracks.
For superior protection, consider BANDě’s advanced waterproofing solutions. Their products offer high-quality sealants designed for various foundation issues. They provide lasting resilience against water intrusion.
Sealing penetrations for pipes and wires is also vital. When installing a vapor barrier, homeowners must cut the membrane carefully around pipes or other penetrations. Then, they should seal the cut membrane with manufacturer-approved mastic. For crawl spaces, after installing the vapor barrier, use seam tape. Tightly seal the barrier around all pipes and other penetrations. This creates a monolithic seal against vapor and soil gases. This meticulous design ensures the foundation’s integrity remains uncompromised.
Upgrading Your Sump Pump System for Reliability
A reliable sump pump system is essential for basement protection, especially during heavy rains or a hurricane. Upgrading your system enhances its ability to manage floodwaters.
When selecting a sump pump, consider several criteria. Homeowners can choose between submersible and pedestal pumps. Submersible pumps are quieter and more efficient. Pedestal pumps are easier to service and less expensive. The required horsepower depends on the building’s square footage and the area’s wetness. A 1/3-horsepower pump is common. Larger buildings or very wet areas may need more powerful pumps. The distance water needs to be pumped also affects flow.
Power source and backup are crucial. Sump pumps can be electric or have a battery backup system. A battery backup and monitoring system ensures continuous operation during power outages. It also provides alerts. Some experts prefer a two-pump system with an inverter battery backup. This provides redundancy if one pump fails. It also operates during power outages. Monitoring capabilities, like phone apps or control boxes with alarms, notify homeowners of high-water levels, power outages, or pump failures. The pump’s performance depends on its flow rate (GPM) and Head (how high water can be pushed). A minimum flow rate of 30 to 35 GPM at 10 to 15 feet of Head is recommended. Higher head distances reduce pumping capacity.
The sump pump should be installed in a low-lying area. It connects to the interior drain tile system. It should be near an area where discharge can run away from the home. Avoid areas prone to debris. Ensure easy access for maintenance. Keep it away from electrical appliances. For severe water issues or large basements, multiple sump baskets with their own pumps and discharges may be necessary. This comprehensive design ensures maximum safety.
Installing a battery backup or water-powered backup sump pump offers significant benefits. They provide uninterrupted protection. They keep your basement dry during power outages. They activate automatically when the primary pump fails. This reduces stress during power failures. They prevent costly water damage. They act as a first line of defense against water damage. This saves money and frustration. They offer peace of mind during severe weather.
Water-powered backup sump pumps offer unique advantages. They do not require batteries, saving money on replacements. They save money on maintenance and repairs due to fewer moving parts. They can operate for a longer period than battery-powered pumps, as long as the household has water. Models like Water Commander™ MG22 can pump up to 1,800 GPH. The MG36 pumps up to 2,830 GPH at a 10-foot lift. This makes them a reliable choice for coastal buildings facing prolonged storms.
Optimizing Exterior Grading and Gutter Systems
Proper exterior grading and a well-maintained gutter system are vital for diverting flood water away from your foundation. This simple design element significantly reduces the risk of basement flooding.
The ideal slope for grading is a 6-inch drop over the first 10 feet from the foundation. This creates about a 5% grade away from the buildings. This ensures surface water drains away effectively. Where physical barriers prevent this ideal slope, homeowners should construct drains or swales. These ensure drainage away from the structure. Impervious surfaces within 10 feet of the building foundation should slope at least 2 percent away from the building. This careful design prevents water from pooling near the foundation.
Gutter systems also play a critical role. Homeowners should schedule regular inspections and cleanings. Inspect gutters before storm season. Clean them at least twice a year. This maintains efficiency and extends their lifespan. Using leaf guards prevents debris accumulation. Downspout extensions guide water further away from the home’s foundation. If unsure about the gutter system’s condition, engage professionals for repairs and upgrades.
Gutters should slope towards downspouts at a rate of 1/2 inch for every 10 feet. This ensures efficient water flow. Secure gutters tightly against the fascia board. Do not make them so tight that they prevent expansion and contraction. Opt for seamless gutters when possible. This reduces leakage points and maintenance needs.
Regularly inspect and clean gutters at least twice a year. Focus on spring and fall. Remove leaves, twigs, and other debris that cause clogs. While cleaning, check for cracks, rust, and holes. Ensure downspouts are clear of blockages. They must direct water away from the foundation. Use a sturdy ladder, gloves, gutter scoops, and a high-pressure garden hose for efficient cleaning. Promptly address minor damages at joints and seams using sealant or patches. Install gutter guards to reduce debris accumulation. This maintains proper water flow. It also decreases cleaning frequency. Ensure correct gutter installation, including proper slope and secure fitting. Consider professional services for seamless gutter installation. This comprehensive approach protects your roof and foundation from water damage.
Elevating Critical Basement Utilities and Appliances
Elevating critical basement utilities and appliances is a key strategy for flood protection. This is especially important for buildings in coastal areas prone to hurricane and storm surge. This elevation minimizes damage during a flood event.
Homeowners should elevate water heaters above the Base Flood Elevation (BFE) in flood-prone areas. Anchor water heaters to wall framing with metal strapping. This is crucial in seismic areas or those prone to coastal flooding, storm surge, and high winds. Elevate water heaters on a solid masonry or concrete pad. A framed wooden or steel platform also works. Consider relocating the water heater to an upper floor or attic if overhead clearance is insufficient. Ensure a drip pan, overflow sensor, and automatic shut-off are installed in the attic. Replacing tank water heaters with tankless models is another option. Tankless models are smaller and lighter. This allows for higher wall placement. When using a platform, attach the water heater base to the platform. Anchor the platform to the floor. Maintain required service and operation clearances. Install flexible service connections for water, electric, and gas lines with enough slack to withstand tremors. If elevation or relocation is not possible, construct permanent concrete floodwalls around equipment like water heaters and furnaces. This is practical for flood depths less than 3 feet. These elevated foundations provide crucial safety.
Protecting other basement appliances from flood damage is also important. Elevate appliances off the floor. Install a sump pump. Use waterproof covers for electrical outlets. Unplug all appliances if a flood warning is issued. Perform regular maintenance on appliances. Do not turn on the HVAC system if water is in or around it. This can spread mold or cause electrocution. A professional HVAC technician should inspect it first. Be aware of potential mold growth in freezers and refrigerators. Even if they appear to work, wet insulation dries slowly. This creates a mold-susceptible environment. Inspect units closely over several days for mold or mildew. These measures enhance the resilience of your home’s systems.
Essential Materials and Tools for Flood Resilience
Choosing the right materials and having the necessary tools are fundamental for successful DIY flood protection projects. These choices contribute to a strong foundation and the overall integrity of your home.
For basement walls, Insulated Concrete Forms (ICF) are highly effective. These blocks, like Fox Block’s ICF, consist of two panels of expanded polystyrene (EPS) insulation. Rebar and concrete are poured into the hollow space. This construction provides superior strength and water resistance. EPS insulation is non-organic. It prevents mold and mildew growth. It allows water to drain quickly. The solid concrete walls prevent water from hiding. While gypsum board may need removal after a flood, the EPS insulation can be cleaned rather than replaced due to mold concerns. This design is excellent for coastal buildings facing hurricane threats.
For basement floors, several flood-resistant materials stand out. Luxury Vinyl Tile (LVT) and Sheet Vinyl are top choices. They are waterproof and resist mildew. LVT resembles wood or stone. Sheet vinyl minimizes water permeation with fewer seams. Both are easy to maintain and install over concrete. Ceramic tiles offer durability and style. They resist water, moisture, and stains. This makes them ideal for damp environments prone to mold. They are low-maintenance and come in various designs. Rubber flooring is water-resistant and durable. It is specifically designed for moisture issues in basements. It offers slip resistance. It withstands flood damage. It minimizes mold/mildew risk. It provides comfortable footing and sound insulation. It comes in rolls or interlocking planks with few seams to prevent water seepage.
Essential tools for DIY basement floodproofing projects include:
Protective Gear: Waterproof boots with non-slip soles, thick rubber gloves, safety goggles, and an N95 respirator mask are essential for safety due to contaminants in floodwater.
Heavy-Duty Trash Bags: Use contractor-grade and tear-resistant bags for disposing of porous, waterlogged items.
Wet/Dry Vacuum: Critical for removing standing water and solid debris. Ideally, it has a wide hose, good suction, and a drainage port.
Squeegees and Mops: For removing remaining puddles and moisture after initial water removal.
Disinfectant and Cleaning Supplies: Industrial-grade disinfectants, stiff scrub brushes, microfiber cloths, and buckets for rinsing sanitize the basement and kill bacteria or mold spores.
Dehumidifiers and High-Powered Fans: These circulate air and remove moisture, preventing mold growth.
Shovels and Buckets: Flat-edged shovels and wide buckets are ideal for removing mud, soil, or silt brought in by floods.
Moisture Meter: This tool assesses dryness.
Quality paintbrush or roller: For applying waterproofing paint or membrane.
Masonry drill: For various foundation repairs.
Stiff brush: For applying waterproofing paint or membrane.
Putty knife: For applying sealants.
These tools and materials empower homeowners to implement effective flood protection strategies. They help create a more resilient home, especially for coastal buildings facing hurricane and storm threats.
Homeowners gain significant power by using these 2025 flood-resistant DIY strategies. They will see reduced flood damage, increased safety, and enhanced property value. Take action now, before flood season, for better protection. A fortified basement is key to a home’s overall resilience and family safety.
FAQ
How often should I check my sump pump, especially in coastal areas?
Check your sump pump monthly, particularly if you live in a coastal region. Test it before any predicted heavy rain or hurricane season. This ensures it works when you need it most for your coastal property.
Can I DIY all basement floodproofing for my coastal home?
Many tasks are DIY-friendly, especially for coastal homes. Sealing cracks and optimizing gutters are good starts. However, complex issues or structural repairs may need professional help for your coastal residence.
What is the most important step for flood protection in coastal regions?
Diverting water away from your foundation is crucial for coastal properties. Proper grading and well-maintained gutters are essential. Elevating utilities also protects your coastal home during a hurricane.
See Also
DIY Basement Leak Repair: Save Money Before Hiring a Contractor
Achieve a Dry, Dust-Free Basement Concrete Floor: A Permanent Solution
Your Home’s Essential Guide to Wall and Floor Moisture Barriers
BANDě’s Top Picks: Best Concrete Dustproofer Sealers for Your Project
Buying Guide: Concrete Densifiers, Hardeners, and Sealers Explained