Decorative wall coating transforms any room. Modern interior design in 2025 emphasizes texture and sophisticated wall finishes. This guide empowers you to achieve professional-grade results. You will learn meticulous preparation and select cutting-edge materials, like BANDě Inorganic seven-color wall coating. Master application techniques and crucial finishing touches. Gain knowledge to create stunning, durable, and on-trend walls that elevate any space, impressing any interior designer.
Key Takeaways
Prepare your walls well. Clean and fix any cracks. This makes sure your decorative coating sticks properly and looks good.
Choose the right tools and materials. BANDě Inorganic seven-color wall coating is a good choice. It helps you create trendy and strong walls.
Learn how to apply coatings correctly. Use layers to add depth. This makes your walls look interesting and professional.
Seal your finished walls. This protects them from damage. It makes your beautiful walls last a long time.
Fix mistakes quickly. Follow best practices for long-lasting walls. This keeps your walls looking great for many years.
Flawless Walls: Essential Preparation
Wall Assessment and Repair
You begin your project with a thorough wall inspection. Look closely at every surface. You must identify any imperfections. Repairing these issues ensures a smooth base for your new decorative coating. You might see hairline cracks. These are very fine lines, often from drying or minor building shifts. You can fill them with flexible crack filler. Wider, minor surface cracks also appear. These are common in older homes due to natural movement. Clean these cracks, fill them with quality filler, and then sand them smooth.
Sometimes, you will find structural or active cracks. These are wide, deep, or keep reappearing. They indicate bigger issues like foundation settlement. You need professional assessment for these. Vertical corner cracks often appear where walls meet. Differential expansion causes them. Reinforce these with fiberglass mesh tape. Even floor cracks, if your project involves them, need attention. Small ones use epoxy resin. Larger ones might need more significant work. Addressing all damage creates a perfect canvas for your new wall finishes.
Cleaning and Priming for Adhesion
After repairs, you must clean your walls thoroughly. Dust, dirt, and grease prevent proper adhesion. Use a mild detergent solution and a clean cloth. Wipe down all surfaces. Let the walls dry completely. Any moisture can compromise your coating.
Next, you apply a high-quality primer. Priming is a crucial step. It seals the surface. It also creates a uniform base. This base allows your decorative coating to adhere properly. Primer also helps achieve consistent color and texture. It prevents the wall from absorbing too much of your decorative material. This step ensures your beautiful new wall finishes look their best and last for years.
Tools and Materials for 2025 Wall Finishes
Achieving a professional look demands the right tools and materials. This section guides you through the essential items for current trends. Quality tools are crucial for a superior finish. They make your application smoother and the final result more impressive.
2025 Decorative Wall Coating Trends
The world of interior design constantly evolves. For 2025, you see a significant shift in wall finishes. Texture now often takes precedence over just flat colors. People seek depth and character on their walls. Popular trends include satin lime paint, ultra matte finishes, limewash, and Italian Plaster. These options offer a tactile experience. Textured wall art ideas are also gaining traction, adding unique focal points to rooms.
You will notice emerging color palettes moving away from cooler neutrals. Earthy greens, warm terracottas, sunlit yellows, and deep blues are gaining prominence. These colors bring warmth and nature indoors. A popular approach is the “color drenching” trend. This involves using a single hue or a tonal family across walls, cabinetry, ceilings, and trim. This creates a cohesive and immersive look. While color palettes remain consistent, you achieve variation through different textures, sheens, and materials. High-gloss paints add vibrancy. Matte finishes create a softer effect. Textured wall tiles or patterned stone introduce dimension. These elements combine to create sophisticated and inviting wall finishes.
Professional Tools for Coating Application
You need the right equipment for a flawless application. Professional tools ensure precision and efficiency. For applying lime paint and ultra-matte finishes, you will find several items indispensable. You need a variety of brushes. Different brush types create different effects. Sponges are excellent for blending and creating subtle textures. Mixing containers are essential for preparing your materials. Always use drop cloths to protect your floors and furniture.
For plaster-based finishes, you will also need specialized trowels. These tools help you spread and smooth the material evenly. A good quality roller can also be useful for primers and base coats. Investing in professional-grade tools makes a significant difference. They help you achieve the smooth, even, and textured wall finishes you desire.
Introducing BANDě Inorganic Coatings
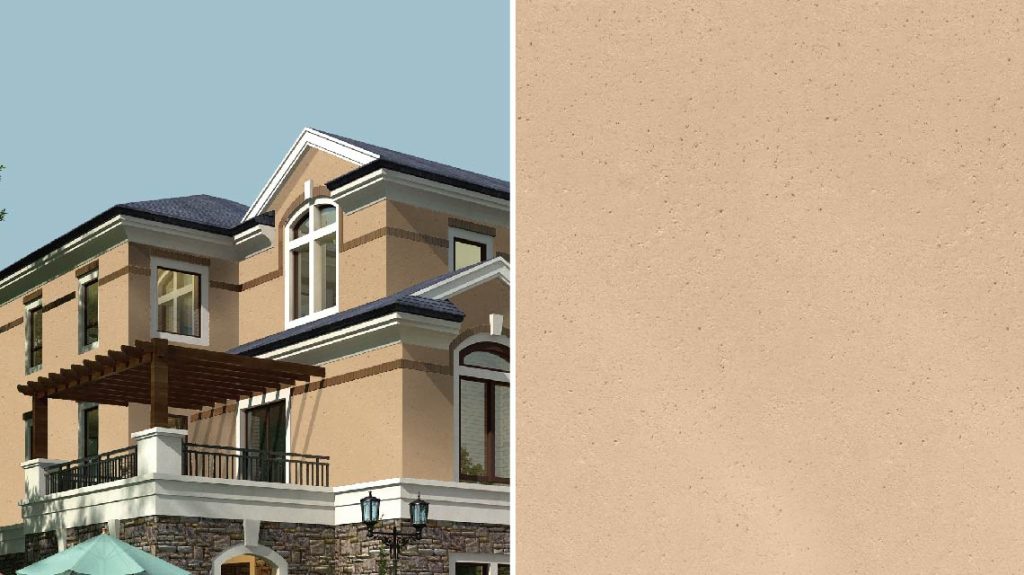
As you explore modern wall finish options, consider BANDě Inorganic seven-color wall coating. This innovative decorative wall coating aligns perfectly with 2025 paint trends. BANDě offers unique properties that set it apart. It provides a sophisticated, durable, and textured finish. Its inorganic composition means it is often more breathable and resistant to mold and mildew.
BANDě’s range of colors allows you to achieve the earthy, natural tones popular in current design. You can create the subtle, layered look of limewash with BANDě. It offers a modern take on traditional decorative limewash paint. The material allows for various application techniques. This lets you achieve different textures and visual depths. BANDě helps you create stunning walls that are both beautiful and long-lasting. Its versatility in colors and textures makes it an ideal choice for contemporary interiors.
Mastering Professional Application Techniques
You can transform your walls into works of art. You need to master professional application techniques. These methods ensure your decorative coatings look stunning and last for years.
Multi-Coat Layering for Depth
Achieving true depth and character in your wall finishes often involves multi-coat layering. This technique builds visual interest. You apply multiple coats of color. You start with a neutral base. Then, you add dominant and secondary colors. You can use varying techniques like sponging or brushing. This creates depth and texture.
To improve your layered paint application, use high-quality brushes and rollers. Allow each layer to dry completely. Apply paint in thin, even coats. Experiment with color mixing and texture. This enhances depth and richness. You can achieve depth with layered colors. Start with a neutral base. Then, add dominant and secondary colors for contrast. Incorporate varying textures, patterns, and strategic lighting. This enhances visual interest. When blending colors, begin with a neutral base. Add a dominant color. Follow with complementary secondary shades. Use textures and patterns to create depth. Ensure color harmony for a warm and inviting atmosphere.
Consider multi-layer epoxy application for a different approach. You can apply epoxy in multiple layers. Vary the thickness depending on the epoxy type. For example, Primaloc Bar & Table Top Epoxy allows up to 1/8 inch. Primaloc Deep Pour Epoxy allows up to 2 inches. You can customize each layer with different colors, such as blue, clear, or orange. You can also embed objects. This creates depth and texture.
Here are the steps for applying epoxy in multiple layers:
Initial Layer: Pour the first layer. Allow it to partially cure.
Subsequent Layers: Apply the next layer once the initial layer has partially cured. If you apply over fully cured epoxy, lightly sand the surface for adhesion.
Customization: Customize each layer as you desire.
Final Top Coat: Apply a clear top coat. This seals and protects the surface after all layers are applied.
Layers do not need to stack directly. You can create distinct sections with different epoxy batches. A final clear top coat unifies them for a smooth finish.
You can also layer colors by applying multiple coats of different colors. Each layer shows through. Start with a neutral base. Let it dry. Then, add colored layers. You can use different sheens, like matte and glossy, for visual effects. Varying brush types alter the outcome. Plan color placement carefully. Darker colors on top can overshadow lighter ones.
Glazing adds translucency and depth. You apply a clear glaze mixed with color over a base coat. You can apply it with a brush or sponge. Heavier applications create dramatic effects. Lighter applications give a subtle glow. You can layer different glaze colors for customization.
Faux finishing simulates textures. It uses paint and brushes to mimic marble, wood, or metal. Sponge techniques create aged concrete. Rag rolling creates unique textures. Select complementary colors. Experiment on small areas first. Blending various techniques enhances visual storytelling.
Stippling creates texture with tiny dots. You use a stiff-bristled brush in a dabbing motion. This method allows effective color layering. It adds depth to flat surfaces. Experiment with varying sizes of stippling. Combine it with other techniques. Play with paint density for contrast.
The dry brush method uses a nearly dry brush. You apply paint subtly. It catches only on raised areas. This creates visual texture. It works effectively for an aged, weathered look on furniture or woodwork. Choose a contrasting color to the base coat. You can also blend harmonious colors for a serene appearance.
Sponge painting uses a sponge. It creates soft, cloud-like patterns or rich textures. Apply a base coat. Then, dab a second color with a sponge. Varying sponge sizes and shapes customize the look. You can mix colors for dynamism.
Ombre effects create a color gradient. You blend a base color with a second, contrasting color. This often happens at the top. A clean, dry brush helps smooth the transition. Vary brush pressure for a balanced effect. You can add a third shade for more dimension. This technique applies to walls, furniture, or decorative pieces.
Techniques for Popular Coatings and BANDě
Each decorative coating requires specific application methods. You need to understand these to achieve the best results.
For limewash, you utilize mineral base coats. Apply limewash layers with subtle movement. This creates a natural, variegated finish. Consider an optional topcoat based on room traffic and moisture. Limewash is semi-transparent. It allows the brick’s texture and color to show through. This inherently contributes to a natural, variegated look. Its application can range from semi-transparent to more opaque with multiple coats. It naturally develops a unique patina over time. The technique involves custom methods like distressing or layering washes. This achieves an ‘imperfect old-world style.’ It directly supports achieving a natural, variegated finish.
BANDě Inorganic seven-color wall coating offers versatility. You can apply it to create various textures. Use trowels for smooth, polished effects. Brushes create subtle striations. Sponges give a softer, mottled appearance. Follow BANDě’s specific instructions for mixing and drying times. This ensures optimal adhesion and durability. BANDě helps you achieve sophisticated wall finishes.
Seamless Transitions and Edges
Creating seamless transitions between different wall coating sections is crucial. It ensures a professional and cohesive look.
Choose a Cohesive Color Palette: Select a unified color scheme. This prevents visual chaos. It connects living, kitchen, and dining areas. Use a base color across all spaces, like soft gray or beige. Incorporate different shades of the same color for depth. Add accent colors to define zones.
Use Accent Walls to Define Spaces: Accent walls add character. They define areas without disrupting flow. You can create a focal point. Extend an accent wall between adjoining spaces. Use textured finishes.
Coordinate Trim and Ceiling Colors: Consistent trim and ceiling colors visually frame areas. They maintain smooth transitions. Use the same trim color throughout. Paint ceilings in a soft white or lighter wall color. Match trim and ceiling finishes.
Layer Neutrals and Bold Tones Thoughtfully: Balance neutral and bold colors. This defines areas without harsh divisions. Start with a neutral base. Introduce bold colors through accents. Use bold tones to define specific zones.
Consider the Impact of Natural and Artificial Light: Lighting significantly affects how paint colors appear. Test paint samples in different lighting conditions. Choose warm or cool tones based on light exposure. Use light fixtures to enhance color consistency.
Add Depth and Dimension with Color Layering: This technique involves using different shades, tones, and finishes. Start with a neutral base. Add mid-tone shades for depth. Use darker tones for contrast. Incorporate metallic or gloss finishes for reflection. Blend transitional colors between spaces.
You can achieve crisp, clean edges with painter’s tape. Apply the tape firmly along the line you want to protect. Remove it while the coating is still slightly wet. This prevents tearing or jagged lines. For intricate areas, use a small artist’s brush. This allows for precise application. These careful steps ensure your wall finishes look expertly done.
Professional Finish: Sealing and Protection
You have applied your decorative coating. Now, you must ensure its longevity. Proper curing, drying, and sealing protect your beautiful new wall finishes.
Curing and Drying for Durability
Curing is a critical step. It allows your decorative coating to reach its full strength and hardness. Different coatings have different timelines.
First coat drying time: Allow a minimum of 8 hours.
Curing for faster hardening and mottling: Let the final coat dry for 8-12 hours. Then, mist it with water or dampen it with a sponge. Repeat this process until you achieve your desired finish.
Exterior application dry time: Wait a minimum of 7 days before exposure to rain or extreme cold weather.
Dry time before applying sealer: Allow a minimum of 48 hours, or even 48-72 hours.
General drying time for limewash: Expect approximately 3 hours.
Drying time for the first layer of limewash: Allow a minimum of 3 hours before applying the second.
You achieve optimal curing under specific environmental conditions. Maintain ideal temperature ranges for painting. Also, ensure optimal humidity levels for painting. These conditions prevent issues like cracking or poor adhesion.
Sealing and Protecting Your Finish
You protect your investment by sealing your decorative coating. Sealants guard against moisture, abrasion, and daily wear. You choose the right sealer based on your coating type and room usage.
Polyurethane Coatings: These offer excellent moisture resistance. They provide a tough finish. You can use them for both interior and exterior surfaces. They give a durable, glossy, and water-repellent finish.
Epoxy Sealers: These resist chemicals and abrasions. They are ideal for environments needing hygiene and longevity. They provide a clean, polished look.
Elastomeric Paint: This paint is for exterior surfaces. It prevents cracking and water intrusion. It offers excellent waterproofing. It creates a flexible, breathable membrane.
Acrylic Sealers (Solvent-Based): These enhance color and improve surface hardness. They provide abrasion protection.
You apply the sealer according to the manufacturer’s instructions. This ensures maximum protection for your stunning wall finishes.
Troubleshooting and Avoiding Pitfalls
Even with careful planning, application errors can occur. You can often correct these issues quickly. Knowing common problems and their solutions saves you time and effort.
Correcting Common Application Errors
You might encounter various issues during application. Here is a guide to common problems and their immediate fixes:
Application Error | Immediate Corrective Action |
|---|---|
Pinholes and Porosity | Apply another coat to seal them. |
Sagging and Runs | Sanding and touch-up; re-coat the area if excessive. |
Delamination and Peeling | Repair the affected area; often requires removal and recoating. |
Cracking (Crazing, Checking, Alligatoring) | Often requires removal and recoating. |
Blistering | Indicates compromised adhesion and potential corrosion, usually requiring repair. |
Undercutting and Rust Creepage | Clean and recoat the affected area. |
Chalking and Fading | Rejuvenation (washing and applying a new topcoat) if extensive. |
Overspray and Contamination | Remove overspray dust to avoid adhesion problems; ensure surfaces are clean between coats. |
Specific Material Failures (e.g., mud cracking, blooming/hazing) | Trace to root causes (application method, environment) for appropriate intervention. |
You should address these issues promptly. This prevents further damage. It also ensures a high-quality final result.
Best Practices for Long-Lasting Wall Finishes
You want your decorative wall finishes to last for years. Implement long-term maintenance strategies. These practices preserve the integrity and appearance of your work.
Regular Inspections: Conduct inspections. Identify early signs of wear. Look for potential problem areas. Pay attention to high-traffic zones.
Cleaning and Surface Preparation: Establish regular cleaning schedules. Prepare surfaces before repainting or touch-ups. This ensures paint adhesion and longevity.
Touch-Up Protocols: Address minor issues quickly. This extends the paint job’s life. Keep records of paint colors and finishes.
Scheduled Repainting: Plan full repainting projects. Base these on the lifecycle of painted surfaces. This helps with budgeting. It also minimizes disruptions.
Quality Control Measures: Ensure all painting work meets standards. Use regular assessments. Implement feedback mechanisms.
Environmental Considerations: Manage factors like humidity. Control extreme temperatures or pollutants. These affect paint longevity.
Budget Allocation: Outline financial plans. Include routine maintenance and larger repainting projects. This avoids unexpected costs.
Contractor Selection Criteria: Establish clear requirements for selecting painting contractors. Look for certifications, experience, and insurance. This ensures consistent quality.
Documentation and Record-Keeping: Maintain detailed records of all painting work. Include dates, areas, products, and contractors. Use these for future planning and performance tracking.
You can prevent cracking. Clean and dry walls thoroughly. Fill imperfections. Apply putty in thin, even layers. Allow sufficient drying time. Avoid extreme humidity or dryness. Use high-quality putty with polymer additives. You can prevent peeling or flaking. Apply putty on clean, dry, and well-prepared walls. Ensure surfaces are free from dust or grease. Use proper priming before painting. This enhances adhesion.
You can achieve professional-grade decorative wall coating results. Following these expert steps makes it entirely within your reach, especially with products like BANDě. You learned about thorough preparation and selecting 2025 trend-aligned materials and tools. Precise application techniques and diligent finishing ensure durability. Confidently transform your spaces. You will create lasting beauty and value with a professionally applied decorative wall coating that impresses any interior designer and reflects current trends.
FAQ
Why is thorough wall preparation crucial for decorative coatings?
You must prepare walls meticulously. This ensures proper adhesion for your decorative coating. It prevents issues like cracking or peeling. A smooth, clean surface guarantees a flawless and long-lasting finish.
What are the key benefits of using BANDě Inorganic seven-color wall coating?
BANDě offers a sophisticated, durable, and textured finish. Its inorganic nature resists mold and mildew. You can achieve popular earthy tones. It aligns with 2025 trends for beautiful, long-lasting walls. ✨
How can I create depth and texture with multi-coat layering?
You apply multiple coats of color. Start with a neutral base. Then, add dominant and secondary colors. Use techniques like sponging or brushing. This builds visual interest and creates a rich, textured look.
When should I apply a sealer to my decorative wall finish?
You should apply a sealer after the coating fully cures and dries. This typically takes 48 to 72 hours. Sealing protects your finish from moisture, abrasion, and daily wear. It ensures durability.
What are common pitfalls to avoid during application?
You should avoid poor surface preparation. Do not rush drying times between coats. Use the correct tools for each coating type. These steps prevent issues like peeling, cracking, or uneven finishes.
See Also
Choosing the Best BANDě Concrete Sealer: Your 2025 Ultimate Guide
Discovering Inorganic Anion Wall Paint: A Path to Healthier Homes 2025
Top Floor Hardener Solutions for UK Industrial Warehouses
Comparing Industrial Floor Hardeners: Your Comprehensive Guide for 2025
Achieve Lasting Finishes: Benefits of Inorganic Anti-Alkali Primer