
Effective waterproofing is crucial for protecting structures and your investments. Applying waterproof paint can be tricky. You need proper techniques for successful application. This guide helps you master waterproof coating application on any surface. You achieve long-lasting protection. Proper waterproofing ensures durability. Use the right waterproof paint. These waterproofing coatings offer peace of mind. Your waterproof paint projects demand quality waterproof paint.
Key Takeaways
Always prepare surfaces well before applying waterproof paint. Clean and fix any damage first. This helps the paint stick better and last longer.
Choose the right waterproof paint for each surface. Different materials like concrete, wood, or metal need specific types of coatings. This ensures the best protection.
Apply waterproof paint carefully, following product instructions. Use thin coats and let each coat dry. This helps the paint work best and protect your property from water.
Understanding Waterproof Coatings and Surface Preparation
What is Waterproof Coating?
A waterproof coating creates a barrier. This barrier stops water from passing through a surface. You use it to protect your property from water damage. It helps prevent moisture penetration. Many types of coatings exist. They offer different benefits. You need the right coating for your project.
Consider the chemical makeup of these coatings. You have options like Cementitious Waterproofing. SikaTop®-107 Plus is an example. Acrylic Waterproofing is another choice. Products like SikaCoat® use acrylic. Modified Polyurethane Waterproofing is also available. Sikalastic®-590 Deckseal fits this category. Bitumen Waterproofing, like Flexoplast®, provides protection too. This coating protects surfaces.
You also find different forms of waterproofing. Liquid Waterproofing Membranes are common. These are polymer-based. They form a seamless, flexible barrier. You apply them to roofs, terraces, and balconies. They adapt to irregular shapes. They are durable and resist UV rays. This waterproof paint is versatile. Crystalline Waterproofing Coating is another type. This is a cementitious slurry. Its ingredients react with concrete. They form an impermeable crystalline complex. This seals cracks. It stops water from getting in. This is an alternative to traditional systems. This waterproof paint offers deep protection.
Choosing the Right Waterproof Coating System
Selecting the correct waterproof coating system is vital. You match the coating to your specific needs. Different surfaces require different solutions. You consider the environment. You also think about the material.
Acrylic-based waterproofing coatings offer many advantages. They are durable and flexible. They form a protective barrier. This barrier resists UV rays, moisture, and mildew. Acrylic waterproof paint dries quickly. You can clean it up easily with water. It is also environmentally friendly. This type of waterproof paint is alkali resistant. It is easy to apply. It has excellent hiding power. It is a thixotropic product. You get high elasticity. It offers excellent UV stability. It is impermeable. It has crack bridging ability. You can dilute it with 10% water for priming. It has low consumption.
These coatings show strong performance. They have a tensile strength greater than 2 N/mm². Their adhesion in peel is greater than 1.5 N/mm². These characteristics make acrylic waterproof paint a strong choice. You choose the best waterproofing coatings for your project. The application will be more effective.
Surface Inspection and Repair
Thorough surface preparation is crucial. It ensures a strong bond. It also gives you even coverage. You must inspect your surface carefully. Look for any damage. Repair these issues before you apply any waterproof paint. This preparation step is key for successful waterproofing.
You might see specific problems. On aluminum surfaces, a thin oxide layer can form. This layer stops coatings from sticking well. It can cause peeling. You must remove this layer. Galvanic corrosion is another issue. This happens when aluminum and steel touch. The aluminum corrodes. This causes blistering and paint failures. You must address this before applying waterproof paint.
For refractory concrete, look for signs of low strength. The material might crumble. It might have weak bonding. Poor surface finish is also a problem. You might see honeycomb, voids, or a rough surface. You must fix these issues. Proper surface preparation ensures your waterproof paint lasts.
Essential Cleaning and Priming for Adhesion
Cleaning your surface thoroughly is the next step. You remove dirt and debris. This ensures good adhesion for your waterproofing paint.
Sometimes, you find efflorescence on masonry. This is a white, powdery substance. You need to remove it. ECCOSAFE Salt and Calcium Remover is a strong acid cleaner. It removes stubborn efflorescence. It also works on heavy grout haze, hard water deposits, and rust stains. You can use it on concrete, granite, basalt, sandstone, and clay pavers. Be careful with natural stone. Always test it first.
To use it, sweep the tiles first. Mix the remover with water. Use 1 part to 20 parts for concrete. Use 1 part to 10-15 parts for other surfaces. Apply the solution. Let it stand for 1 to 2 minutes. Agitate the surface. Do not let it dry. Remove the solution with a wet vac or mop. Rinse twice with ECCOSAFE Neutral Cleaner. This removes acidity. Remember, do not mix this remover with other cleaners. Wear protective gear. Keep it away from carpets and treated metals. Do not use it on acid-sensitive stones. These methods ensure a clean surface.
Other methods prevent efflorescence. RUCOSAN products are silicone impregnations. They create a water-repellent barrier. This stops salt blooming. They do not remove existing efflorescence. They prevent it.
Priming is often necessary. A primer helps the waterproof paint stick better. You need it for smooth or porous surfaces. This is especially true in key waterproof areas. Some self-adhesive coatings do not need a primer. Always check the product instructions. This ensures quality application.
Applying Waterproof Coating: Step-by-Step Techniques
You have prepared your surface. Now, you are ready to apply waterproof paint. This section guides you through the process. You will learn how to apply waterproof paint effectively. These techniques ensure a durable and long-lasting waterproof coating.
Planning and Initial Setup
Before you begin, gather all your tools. This includes brushes, rollers, sprayers, and safety gear. You also need to consider the environment. The ambient temperature plays a big role in how your waterproof paint performs.
Condition | Value |
|---|---|
Ambient Temperature | 4°C to 45°C |
You should apply waterproof paint when the temperature is between 4°C and 45°C. This range helps the waterproof coating cure properly.
Safety is always first. You must protect yourself when working with waterproofing coatings.
Category | Precaution |
|---|---|
General Handling | Wear appropriate Personal Protective Equipment (PPE). Ensure adequate ventilation. Keep containers closed. Store in original containers. |
Storage | Protect from freezing. Avoid direct sunlight for extended periods. Ideally, store in a climate-controlled warehouse. |
First Aid (Inhalation) | Move to fresh air. Assist breathing if needed. Seek immediate medical attention. |
First Aid (Eye Contact) | Flush eyes with water immediately. Seek immediate medical attention. |
First Aid (Skin Contact) | Wash affected area with soap and water. If redness persists, seek medical attention. |
First Aid (Ingestion) | Dilute with water. DO NOT INDUCE VOMITING. Never give fluids or induce vomiting if the victim is unconscious or convulsing. Seek immediate medical attention. |
Spill Supervision | Ensure cleanup personnel wear appropriate PPE. Keep non-essential personnel away from contaminated areas. |
Small Spills | Mix with absorbent (sawdust or kitty litter). Collect saturated absorbent into a covered container. |
Large Spills | Prevent entry into sewers/watercourses by diking. Advise authorities if product enters water systems. Mix with absorbent (sawdust or kitty litter). Collect saturated absorbent into a covered container. |
Engineering Controls | Prefer airless spray to minimize overspray. Provide ventilation to remove airborne particles. Use good painting practices. |
Ventilation | Use only with adequate ventilation to maintain occupational exposure limits. |
Protective Equipment | A dust respirator is recommended even with adequate ventilation. If occupational exposure limits may be exceeded, use an approved air-supplied respirator or positive pressure, self-contained breathing apparatus (SCBA). |
Contaminated Equipment | Wash before reuse or discard. Thoroughly clean equipment after use. Dispose of waste according to all federal, state, regional, and local regulations. |
Always follow these guidelines. They keep you safe during the waterproofing process.
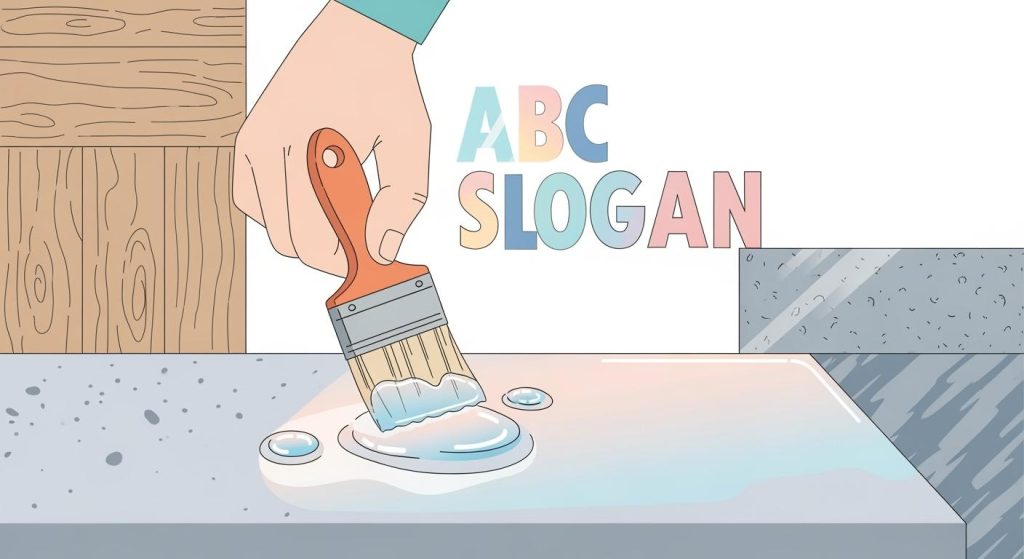
How to Apply Waterproof Paint to Concrete and Masonry
Applying waterproof paint to concrete and masonry needs careful attention. You want a uniform coating application. This ensures maximum protection. Here are some effective techniques:
Brushing Method: Apply waterproof paint evenly along the substrate texture. Focus on leak-prone areas first. These include corners and pipe roots. Then, cover larger areas.
Rolling Method: Use a roller gently. Ensure uniform thickness. Employ a cross-rolling method. This means you go up-down or left-right staggered. It prevents missed spots or unevenness.
Spraying Method: Adjust the nozzle and pressure for even atomization. Maintain a distance of 20-30cm from the substrate. Move steadily. Avoid local accumulation.
For larger projects or specific concrete types, you have other methods for uniform thickness:
Vibration Casting: This method is common for LCC and ULCC.
Frequency: Use 10,000-12,000 vibrations/minute.
Duration: Vibrate until air bubbles stop. This usually takes 10-30 seconds per location.
Spacing: Space vibrations every 300-500mm.
Depth: Insert the vibrator to 2/3 of the layer thickness.
Technique: Insert slowly, withdraw quickly.
Layer Thickness: Apply a maximum of 150-200mm per layer. For critical areas, use 100mm. Complete each layer before starting the next. Do not wait more than 30 minutes between layers.
Pumping Application: Use this for large volumes and difficult access.
Distance: Maximum horizontal is 100m, vertical is 30m.
Pipe Diameter: Use a minimum of 50mm.
Process: Prime the pump with mortar first. Maintain steady pressure. Clean the system immediately after use. This method offers more consistent density.
Gunning/Shotcreting: This is ideal for repairs, vertical linings, and fast turnaround.
Angle: Maintain a perpendicular angle to the surface.
Distance: Keep a consistent distance (0.5-1.5m).
Rebound: Minimize rebound. Aim for typically 15-20%.
Finishing: Trim excess immediately. Work in sections to ensure consistent thickness.
You should apply thin coats applied multiple times. Each coat should be approximately 0.5-1mm thick. Avoid applying too thickly at once. This prevents slow drying and cracking. Lightly sand each layer after drying. This ensures adhesion for subsequent coats. These construction tips help you achieve uniformity. They enhance waterproofing.
Applying Waterproof Coating to Wood and Decks
Wood surfaces present unique challenges. They expand and contract with temperature and moisture changes. You need a waterproof paint that can handle this movement.
Look for flexible and breathable waterproofing coatings. These coatings allow for expansion and contraction. They also offer waterproof and mold-resistant properties. You want a highly durable and impact-resistant product. This protects against dents and scratches.
TAMSEAL 23 Polyurethane Liquid Applied Waterproofing Membrane is a good example. It is a single-component, bitumen-modified polyurethane membrane. It cures into a permanently flexible, seamless, rubbery, elastic, and tough film. This product is elastomeric. It allows for expansion and contraction over a broad temperature range. It maintains its flexibility and waterproofing properties. You can apply this waterproof paint over various surfaces, including wood.
Coating Metal Surfaces for Protection
Metal surfaces need protection from corrosion. This is especially true for steel. You must use the right primer before applying waterproof paint.
Estotect Zincrich is an excellent anti-corrosion primer. You can use it for exposed steel reinforcement.
It is a single-component epoxy zinc primer.
It actively resists corrosion. It uses an active zinc-rich system. This combats corrosion by electrochemical means.
You can use it with Estopatch repair products.
It is easy to use because it is a single-component product. It has no restrictive pot-life. It is economical due to minimal waste.
For irregular metal shapes, adhesive sealants and tapes are highly effective. You can apply them easily with an applicator. They conform to spaces to fill gaps. 3M adhesive sealants can be extruded in any shape on a substrate. They are non-sag to fill gaps. 3M™ Extreme Sealing Tapes are also great. They fill larger and irregular gaps with an applicator. They are conformable over rivets. These methods are perfect for complex metal surfaces.
Multi-Coat Application and Proper Curing
Most waterproofing coatings require multiple coats. You must allow each coat to dry before applying the next. This is crucial for proper adhesion and performance. Always check the product’s instructions for specific drying times.
Environmental factors affect curing time. The INTEGRITANK® system, a spray-applied waterproofing system, shows high tolerance to climatic conditions. It performs well in temperatures exceeding 40°C. This system cures quickly. It allows for rapid progress. Its performance was not negatively affected by hot, windy conditions. It also resisted dust and sand during application. This shows its robustness against various environmental challenges. These conditions could impact the curing time of other liquid-applied waterproofing systems.
Sealing, Detailing, and Final Testing
After applying your final coat of waterproof paint, you need to seal and detail specific areas. This ensures complete waterproofing. Pay close attention to penetrations.
For pipe penetrations in a waterproof membrane, follow these steps:
Clean the area: Remove loose dust, dirt, and rust from the penetration and surrounding substrate. Use a clean, dry cloth or brush.
Cut the membrane: Trim the Preprufe SCS Membrane to be within 1/2 inch (12mm) of the penetration. If the gap is 1 inch (25mm) or more, use a filler strip to reduce the gap.
Apply sealant: Use Preprufe Hydrophilic Sealant to fill the gap. Form a continuous fillet between 1/4 inch (6mm) and 1 inch (25mm) thick. Extend a 90 mil (2.2mm) continuous coating of sealant onto the membrane surface. Overlap by at least 1 inch (25mm).
Effective application involves matching sealant characteristics to environmental demands and materials. This ensures a tight, lasting seal. Once everything is dry, perform a final test. You can use a water spray test for horizontal surfaces. This confirms your waterproofing is successful.
Troubleshooting Common Waterproofing Issues
Even with careful application, you might encounter issues. Knowing how to troubleshoot helps you fix problems quickly.
One common problem is blistering. Single-component cold-applied waterproofing coatings are prone to pinhole and blister formation. This happens due to their sensitivity to moisture. If you see blisters, you might need to cut them out. Then, reapply the waterproof paint in those areas. Ensure the surface is completely dry before reapplying.
Always refer to the product’s technical data sheet. It provides specific guidance for your chosen waterproof coating. These tips help you achieve a perfect waterproofing result.
You now know meticulous preparation and precise application are vital for long-lasting protection. We covered surface-specific techniques and material selection for effective waterproofing. Apply waterproof paint to various surfaces with confidence. Your property will enjoy superior waterproofing with the right waterproof coating and waterproof paint.
FAQ
How often should you reapply waterproof paint?
Reapplication depends on the product and exposure. You should check the manufacturer’s guidelines. High-quality waterproof paint can last many years. Inspect your surface regularly for wear. This waterproof paint protects your investment. Choose the right waterproof paint.
Can you apply waterproof paint over existing paint?
Yes, you can, but proper preparation is key. You must clean and prime the surface thoroughly. Ensure the old paint is sound. This helps the new waterproof paint adhere well. This waterproof paint needs a good base. Apply waterproof paint carefully.
What are the benefits of using waterproofing paint?
Waterproofing paint protects your property from water damage. It prevents mold and mildew growth. You get enhanced durability and a longer lifespan for your surfaces. This specialized waterproof paint offers great protection. This waterproof paint is essential.
See Also
Choosing the Ideal Flexible Waterproof Sealer for Diverse Project Needs
Your Essential Guide to Mastering Cement Crack Sealer for Durable Fixes
BANDě’s Expert Guide: Selecting the Optimal Flexible Waterproof Sealant
BANDě Concrete Sealers: Film-Forming Versus Penetrating for Australian Climate
A Complete Buying Guide for Concrete Densifiers, Hardeners, and Sealers