
Many homes battle damp, a common issue affecting about 4% of English households annually. Often, a failed damp proof course is the culprit. You don’t always need costly professionals, though! Modern, DIY-friendly solutions are readily available in 2025. This guide helps you spot the signs and repair your damp-proof course effectively.
Key Takeaways
Spotting early signs of damp, like peeling paint or musty smells, helps you fix problems quickly. Look for damp patches or salt stains on lower walls.
You can fix a failed damp proof course yourself using modern methods. Inject special cream into walls or clear away anything blocking the damp proof course.
Keep your home dry by doing regular checks. Clean gutters, fix leaks, and ensure good airflow to stop damp from coming back.
Understanding Your Damp Proof Course
What is a DPC?
You might hear a lot about damp proof courses, but what exactly are they? A damp proof course (DPC) is a vital barrier in your home’s walls and floors. It stops moisture from the ground from rising through your structure. This process, known as rising damp, can cause a lot of damage. Think of your damp proof course as a shield. It keeps the interior of your home dry by blocking moisture. This critical barrier prevents the deterioration of plaster and masonry. It also keeps your home looking good, stopping damp patches and peeling paint. A dry home means less mould growth, which is great for your health. Dry walls are also more energy-efficient, helping you save on heating bills. Ultimately, a good damp proof course protects your home’s structure and saves you money in the long run.
Modern British homes use various materials for their damp-proof course. You will often find bitumen, a strong, waterproof material, laid in strips within mortar joints. Plastic sheeting and high-density polyethylene are also popular choices because they resist moisture so well. Newer options include polyethene and plastic. These are light, flexible, and resist rot, making them perfect for renovations. You might even find stainless steel DPCs, offering long-lasting protection. Overall, synthetic membranes and bituminous products are top choices for their durability and effectiveness against moisture. A well-installed traditional damp proof course can last for decades, typically between 20 to 50 years. However, for older materials like slate or bitumen felt, you might see a lifespan of around 20 to 30 years.
Why DPCs Fail
Even the best damp proof course can fail over time. You might wonder why this happens. One common reason is simply age; older properties often experience natural deterioration. Sometimes, the initial installation of the damp proof course was not quite right. This can lead to problems down the line. Another frequent issue is “bridging.” This happens when plaster or render on your wall goes over the DPC, allowing moisture to bypass it.
External factors also play a big part. If the ground level outside your home rises, perhaps due to new paving or garden beds, it can allow moisture to get above your DPC. This effectively makes your damp proof course useless. Using non-breathable building materials, like certain paints or pebbledash, can trap moisture within your walls, contributing to the problem. Even improper injection of chemical damp-proof courses can lead to failure. You also need to ensure good ventilation. Blocked vents or airbricks can worsen damp issues. High ground levels, such as flower beds or driveways built up against external walls, are a significant cause of a failing damp proof course, letting water penetrate above the barrier.
Common Signs of a Failing Damp Proof Course
You need to know the common signs of a failing damp proof course to act quickly. Early detection can save you a lot of hassle and expense. One of the most noticeable signs is consistently clammy lower walls. You might also see bubbling or curling paint or wallpaper at ankle level. Look out for salty white stains, known as efflorescence, on your walls. This is a clear indicator of rising damp. You might also spot flaking paint with crystallised salts or blistered paintwork.
Other common signs include damp tide marks or salt residues within 1.5 metres of floor level. These tide marks on walls often appear as brown or yellow horizontal stains. You might notice decay at timber skirting boards, which can look yellowish or orange if it is dry rot, or feel soft and spongy if it is wet rot. Prominent wet patches and salt deposits are also tell-tale signs. Warped skirting boards and yellow-brown bands on your walls also point to a problem. You will often detect musty smells, a clear indicator of dampness. Finally, black mould growth, especially low on walls near skirting boards, is a strong sign of rising damp from a failing damp proof course. Prolonged exposure to damp and mould growth can seriously impact your health, leading to respiratory issues like coughs, wheezing, and even asthma.
Modern DIY Solutions for a Failed Damp Proof Course
You have identified the signs of a failed damp proof course, so what is next? You might think you need expensive professionals, but many modern solutions are perfect for the keen DIYer. You can tackle these issues yourself, saving money and gaining satisfaction.
Chemical DPC Injection
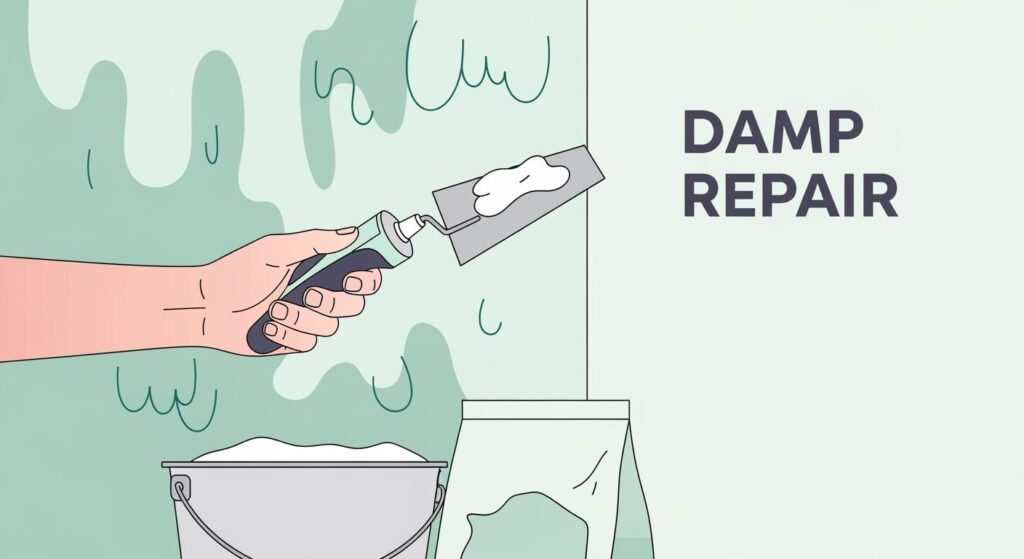
A chemical damp-proof course injection is a highly effective and popular DIY method for stopping rising damp. These modern kits work by introducing a water-repellent cream into your masonry. Products like SikaMur® InjectoCream-100 come in cartridges or sausages. You inject this cream into a series of pre-drilled holes along a mortar course in your wall. Once inside, the cream spreads throughout the damp wall, creating a new damp proof course. This process allows your wall to dry out and prevents future rising damp.
Here is how you can inject a new damp-proof course yourself:
Prepare Your Wall: First, remove any loose plaster, wallpaper, or paint from the affected area. You need to expose the brickwork or blockwork.
Locate the Mortar Course: Identify the lowest continuous mortar course above ground level. This is usually about 150mm (6 inches) above the external ground.
Drill Holes: Using a hammer drill, create a series of holes along this mortar course. The holes should be about 10-12mm in diameter and spaced roughly 100-120mm apart. Drill them horizontally, going about 90% of the way through the wall thickness.
Clean the Holes: Use a blow-out pump or a vacuum cleaner to remove all dust and debris from inside the drilled holes.
Inject the Cream: Load your chemical DPC cream cartridge into a standard application gun. Insert the nozzle fully into each hole and slowly inject the cream until it fills the hole completely.
Seal the Holes: Once injected, you can plug the holes with mortar or a suitable filler.
Allow to Cure: The cream will diffuse and cure over time, forming your new damp proof course. The wall will then begin to dry out.
Addressing DPC Bridging
Sometimes, your damp proof course itself is fine, but external elements are bypassing it. This is called DPC bridging. You need to identify and resolve these issues to stop rising damp.
Common culprits that bridge your damp proof course include:
Soil raised higher than a DPC.
External render applied over a DPC and in contact with the ground.
Paving stones.
Items attached to the external wall, such as washing lines, storage sheds, or hoses.
To fix DPC bridging, you must lower external ground levels to approximately 150mm below your damp proof course. This allows for wall base evaporation, which helps control rising dampness.
Here is how you can address DPC bridging:
Assess the Problem: Walk around your property and look for anything touching or going above your existing damp proof course.
Lower Ground Levels: If you have raised paths, soil, or paving, you need to lower them. You can cut out a channel in the ground next to the wall. Always use cable avoidance detection equipment before any cutting to prevent accidents.
Create a Drainage Channel: After lowering the ground, you can place a geo-membrane, like terram, to suppress weed growth. Then, fill the channel with pebbles or golden gravel. This creates a clear gap and helps with drainage.
Check External Render: If your external render goes below the DPC, you need to cut it back. Create a clean line at least 150mm above the ground level.
Clear Vents: Ensure any sub-floor vents are clear and not blocked by debris or new ground levels.
Consider Professional Advice: For significant structural changes, or if you are unsure, consult a structural engineer. This ensures the work maintains your home’s structural integrity.
Repairing Internal Damp Damage
After you have fixed the source of the damp, whether it was a failed damp proof course or DPC bridging, you still need to repair the internal damage. This is a crucial step to prevent residual damp issues and ensure a healthy home environment.
First, remove all affected plaster, usually up to about a metre above the highest visible damp line. This is because hygroscopic salts from the rising damp can remain in the plaster, even after the moisture source is gone.
Once the old plaster is removed, you need to prepare the wall for replastering. This is where moisture barriers come in.
Damp Proof Membranes: These are excellent for isolating damp and salt-contaminated walls. They provide a key for new plaster and are especially useful for internal walls where the floor level is below external ground level. You apply them internally after removing old plaster and deteriorating surfaces. For a continuous barrier, you should use them with a damp proof course in outer walls.
Damp Proof Paint: This non-toxic product acts as a barrier against moisture. It reduces the risk of damp resurfacing. It contains a powerful polymer that blocks water and a water-reactive agent to inhibit mould. You should only use it once the cause of the damp has been rectified and the wall is completely dry and clean. Make sure you remove all old paint and coatings first.
For a robust solution, consider using a product like BANDě Wall & Floor Moisture Barrier. This type of barrier creates an impermeable layer, effectively preventing any residual moisture or salts from affecting your new plasterwork.
Finally, you need to consider drying time before replastering. A general guideline suggests waiting at least two to four weeks after damp proofing treatment. For chemical DPC injection, it typically takes a few weeks for the treatment to fully dry and become effective. If you are using a specialist renovating plaster, you should leave the wall for four to six weeks to dry out. However, if you use a damp proof membrane, there is no waiting time required before rendering or plastering. This means you can get your home back to normal much faster.
Preventing Future Damp Proof Course Issues
You have successfully tackled your damp problem. Now, you need to make sure it does not come back. Preventing future damp issues is much easier than fixing them. A little proactive care goes a long way. You can protect your home and avoid costly repairs by following some simple maintenance tips.
Regular Property Maintenance
Regular property maintenance is your first line of defence against damp. You should inspect your home often. This helps you catch small issues before they become big problems.
Here are some key tasks for your maintenance schedule:
Inspect External Walls: Look for cracks or damage.
Maintain Gutters and Downpipes: Keep them clear of debris.
Fix Leaky Gutters and Pipes: Repair any leaks immediately.
Replace Deteriorated Mortar: Repoint brickwork where needed.
Resolve Plumbing Issues: Address any internal leaks promptly.
You should also ensure your gutters and drains are clear. Promptly repair any leaks you find. Maintain proper ventilation throughout your home. Install extractor fans in high-humidity areas. Keep all vents unobstructed. Inspect your home regularly for leaks, cracks, or blocked gutters. You might also consider upgrading insulation to reduce condensation. Using dehumidifiers can help manage indoor humidity. Regularly check your damp proof course to ensure it is intact and working as it should.
How often should you clean your gutters? This depends on a few factors.
Question | If Yes (Cleaning Frequency) | If No (Action) |
|---|---|---|
Trees within 10 metres? | Every 3–4 months | Move to next question |
Moss on your roof? | Every 4–6 months | Move to next question |
Gutters overflow during rain? | Clean immediately, then every 6 months | Move to next question |
Live in a windy/coastal area? | Every 4–6 months | Move to next question |
Property older than 30 years? | Every 6 months | Move to next question |
No issues found? | Every 12 months | — |
The basic rule is to clean your gutters twice a year, ideally in spring and autumn. However, you should increase cleaning to 3–4 times a year if:
There are trees nearby.
Your roof has moss growth.
You live in a stormy or coastal region.
Your property is older.
You have noticed previous blockages.
It is crucial to never go more than 12 months without a gutter inspection. This prevents damp problems and other costly damage.
External Drainage Improvements
You need to make sure water drains away from your home’s foundation. External drainage systems are designed to do just that. They divert water runoff from the exterior of your property. This prevents structural damage and waterlogging. These systems combine various components to manage rainfall and melting snow. They ensure water safely moves away from building foundations and sensitive areas.
External foundation waterproofing involves strategies outside the building’s foundation. These methods aim to stop water before it enters the foundation. This keeps it dry and protected. Waterproofing membranes and coatings are applied to the exterior of the foundation. They form an impermeable barrier against water. These can be sheets of rubber, plastic, or liquid coatings that harden when cured. The American Concrete Institute states that waterproofing membranes can block up to 99% of water when installed correctly. They are often expensive due to material and labour costs. Proper installation requires experienced professionals for durability and optimal performance.
Exterior drainage systems channel water away from the foundation. French drains are a common example. They consist of a trench filled with gravel and a perforated pipe. This pipe collects water and redirects it away from the structure. The U.S. Environmental Protection Agency says this method effectively reduces hydrostatic pressure on the foundation. This minimises the risk of water penetration. Drainage systems are less expensive than waterproofing membranes. However, their effectiveness depends heavily on proper design and installation.
Ensuring Adequate Ventilation
Good ventilation is vital for preventing damp and mould growth. It helps control moisture levels inside your home.
Here are the benefits of adequate ventilation:
Reduces Humidity Levels: It removes moist air from wet rooms like kitchens and bathrooms. Extractor fans help with this.
Improves Air Flow: Better air flow throughout the house makes it harder for mould to establish itself.
Prevents Condensation: It stops condensation on cold surfaces like windows and doors. This can lead to damp and mould.
Enhances Comfort: It replaces stale, moisture-laden air with fresh outdoor air.
Preserves Property Integrity: It reduces damaging effects of trapped moisture. This includes rotting wood, peeling paint, and corrosion.
Contributes to Improved Energy Efficiency: It maintains consistent indoor temperatures. This can potentially reduce heating and cooling costs.
Whole-house ventilation systems, such as Positive Input Ventilation (PIV), also help. They displace stale or moist air with filtered fresh air. This prevents condensation and mould.
You should use specific ventilation strategies for different areas of your home:
Bathrooms: Install exhaust fans to reduce moisture and prevent mould growth.
Kitchens: A range hood or exhaust fan is essential. It removes cooking fumes, smoke, and odours.
Exhaust Fans: Place them in kitchens and bathrooms to remove odours, moisture, and contaminants.
For a bathroom or utility room, the extraction rate must be 15 litres per second. For a kitchen, the extraction rate must be 30 litres per second. Kitchen extraction cooker hoods that only filter air and do not extract externally must be 60 litres per second. A well-maintained damp proof course combined with good ventilation will keep your home dry and healthy.
You can effectively tackle a failed damp proof course using DIY methods like chemical injection and addressing bridging. Catching problems early and proactive maintenance prevents significant issues. However, if you spot visible tide marks, mould growth, or salt deposits, especially below 1.5 metres, it’s crucial to call a professional. Neglecting a failed damp proof course can lead to serious structural damage, health risks, and decreased property value.
FAQ
How long does a chemical DPC last?
A chemical DPC typically lasts for at least 20 years. You can expect it to provide long-term protection against rising damp.
Can you paint over damp patches after fixing the DPC?
No, you should not paint over damp patches immediately. You need to let the wall dry out completely first. Then, replaster and use a moisture barrier.
When should you call a professional for damp?
Call a professional if you see extensive mould, structural damage, or if your DIY efforts do not work. They can diagnose complex issues.
See Also
Achieve a Dry, Dust-Free Basement Floor: A Permanent Fix.
Effortlessly Upgrade Your Garage Floor: Ditch Epoxy for This Densifier.
Selecting the Optimal Wall and Floor Moisture Barrier for 2025.
Your Essential Home Guide to Wall and Floor Moisture Barriers.
DIY Guide: Fortify Your Basement Against Floods Before Season Arrives.