
Seamless concrete patch repairs play a crucial role in maintaining and enhancing the look of concrete surfaces. They not only improve aesthetics but also extend the lifespan of your concrete. By following key steps—assessing damage, preparing the surface, and applying the patch—homeowners can achieve a flawless finish.
Tip: Using a fast-set epoxy for repairs can offer a seamless finish while ensuring durability against heavy traffic and chemicals.
Key Takeaways
Identify the type of damage before starting repairs. Common issues include scaling, spalling, and cracking. Early detection helps in planning effective repairs.
Prepare the surface thoroughly for better adhesion. Clean the area using degreasers or acid etching to ensure the patching material bonds well.
Follow a systematic approach when applying the patch. Assess the surface, clean it, choose a bonding method, and smooth the patch for a seamless finish.
Assessing Damage
Types of Damage
Before diving into repairs, it’s essential to identify the types of damage present in the concrete. Common issues include:
Scaling: This occurs when the surface peels or flakes due to constant water exposure.
Spalling: Here, the surface breaks off, often caused by moisture and temperature changes.
Cracking: Cracks can develop from temperature fluctuations or heavy loads, compromising the integrity of the concrete.
Efflorescence: This white, powdery stain appears when water deposits leave behind mineral residues.
Discoloration: Stains from minerals and contaminants can create uneven patches on the surface.
Identifying these issues early helps homeowners understand the necessary steps for effective repairs.
Repair Scope
Once you recognize the types of damage, the next step is to determine the repair scope. This involves evaluating several criteria:
Criteria | Description |
|---|---|
Size and Length | Measure the size and length of cracks, spalled areas, or scaling patches to determine damage magnitude. |
Depth | Assess the depth of damage to evaluate its impact on structural integrity. |
Structural Impact | Consider if the damage affects load-bearing capacity or stability, requiring comprehensive repairs. |
Type and Extent of Damage | Different damage types require specific repair techniques, influencing method selection. |
Structural Considerations | The significance of the damaged area affects the repair approach, with critical elements needing robust methods. |
Environmental Factors | Conditions like temperature and moisture impact the choice of materials and methods. |
Time Constraints | Urgency and available time for repairs can influence method selection. |
Budgetary Constraints | Available budget may affect the choice of repair methods, with some being more cost-effective. |
By carefully assessing these factors, homeowners can create a targeted repair plan that addresses the specific needs of their concrete surfaces. This thorough evaluation not only ensures effective repairs but also helps prevent future issues, such as new cracks from developing.
Tip: Regular inspections can help catch damage early, making repairs easier and more cost-effective.
Preparing to Patch Concrete
Before applying any patch concrete, proper surface preparation is essential. A clean surface ensures that the patching material adheres effectively, leading to a durable and seamless repair. Here are some key cleaning techniques and the tools and materials you’ll need for a successful patching job.
Cleaning Techniques
Effective cleaning techniques can significantly enhance the adhesion of your patching material. Here are some methods to consider:
Cleaning Method | Description |
|---|---|
Degreasers | These break down oil, grease, and chemical stains. Apply undiluted, let sit for 15-20 minutes, scrub, and rinse. Repeat if necessary. |
Acid Etching | This method dissolves cement to reveal aggregates, creating a textured surface. It’s effective for removing laitance but not for oil or grease. Always wear PPE when using this method. |
Surface Retarders | Used on fresh concrete to prevent hydration, exposing coarse aggregate. This requires pressure washing afterward. |
Cleaning the surface thoroughly is crucial. Any contaminants, such as oils or dust, can impair the adhesion of the patching material. A clean surface allows for better bonding, which is vital for the longevity of the repair.
Tools and Materials
Having the right tools and materials on hand can make the patching process smoother and more efficient. Here’s a list of essentials:
Tool/Material | Description |
|---|---|
Concrete Filler | A reliable solution for repairing and restoring damaged concrete surfaces, providing durability. |
Mixing Paddles | Essential for achieving a uniform mixture of concrete filler, enhancing performance. |
Trowels | Designed for easy handling and precise application, ensuring even spreading of the filler. |
Floats | Ideal for smoothing the repaired surface, contributing to a flawless finish. |
In addition to these, consider the following tools:
Cleaning Tools: Use a chipping hammer and stiff wire brush for surface preparation.
Application Tools: A putty knife works well for small holes, while a steel trowel is better for larger areas.
Bonding Agent: A high-quality liquid adhesive like Weld-Crete can improve adhesion.
Concrete Mix: Choose a high-strength concrete mix or rapid-set mortar for vertical surfaces.
Safety Gear: Don’t forget vinyl gloves, safety glasses, and a dust mask to protect yourself during the process.
By ensuring proper surface preparation and using the right tools, homeowners can achieve a seamless concrete patch repair that stands the test of time.
Tip: Always prioritize safety by wearing appropriate protective gear when working with concrete and cleaning agents.
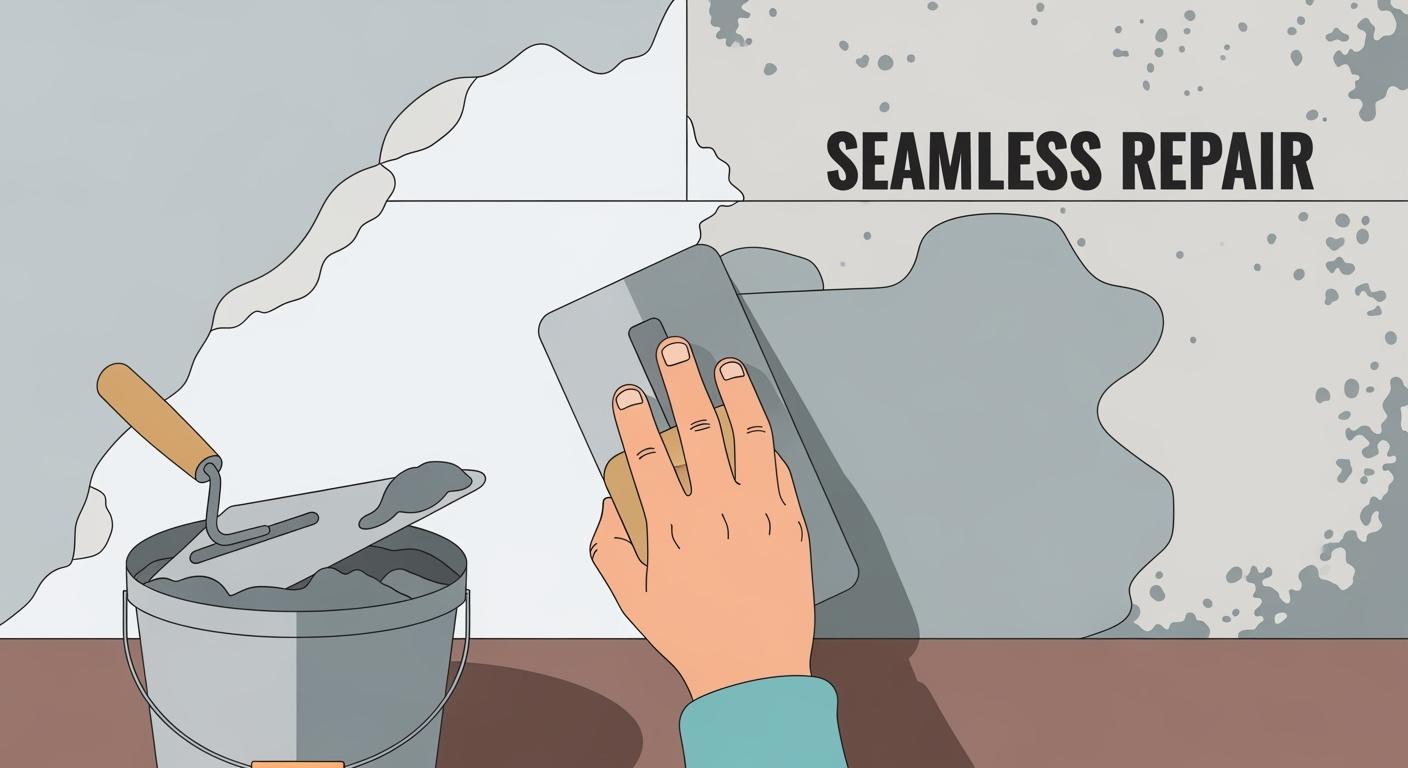
Concrete Patch Repair Techniques
Applying the Patch
When it comes to applying a concrete patch, following a systematic approach ensures a seamless finish. Here’s a step-by-step guide:
Assess the Surface: First, check if the concrete is structurally sound. This step is crucial for a successful repair.
Clean Thoroughly: Remove all loose debris and contaminants from the area. A clean surface promotes better adhesion.
Choose a Bonding Method: You can opt for a mechanical method, like applying a wet scratch coat, or a chemical method using a liquid bonding agent.
Wet the Surface: Moisten the area to prevent rapid water loss from the patching material.
Apply the Concrete Mixture: Use a high-quality concrete patching compound to fill the hole. For deeper repairs, consider applying in layers.
Smooth the Surface: Once the patch is in place, use a trowel to smooth it out, ensuring it blends with the surrounding area.
Using polymer-modified patching compounds can significantly enhance the performance of your repairs. These materials are stickier and more flexible than standard mixes, providing better adhesion and durability.
Smoothing for Seamlessness
Achieving a seamless finish requires careful attention to detail. Here are some effective techniques:
Technique | Description |
|---|---|
Overfilling | Apply the patching compound slightly overfilled to allow for leveling. |
Straightedge | Use a straightedge to level the patch once it starts to firm up. |
Texture Matching | Replicate the original surface texture while the material is still workable. |
Additionally, applying a bonding agent can improve adhesion, especially for deeper holes. This step is essential to prevent issues like cracking and delamination. Proper curing also plays a vital role in the final quality of the repair, as it helps maintain the bond between the new and existing concrete.
By following these techniques, homeowners can achieve a professional-looking concrete patch repair that not only looks great but also stands the test of time.
Achieving a seamless concrete patch repair involves several key steps: assessing damage, preparing the surface, and applying the patch effectively. By using proper techniques, homeowners can prevent further damage, extend the lifespan of their concrete, and ensure structural integrity. So, roll up your sleeves and tackle those repairs with confidence! 🛠️
Tip: Regular maintenance, like inspections and resealing, can keep your repairs looking great for years to come.
FAQ
What is the best method for bonding to existing concrete?
Using a high-quality bonding agent before patching ensures strong adhesion and durability for your repair.
How long does it take for a concrete patch to cure?
Typically, a concrete patch takes about 24 to 48 hours to cure, depending on environmental conditions and the type of patching material used.
Can I use concrete coloring products on my patch?
Yes, you can use concrete coloring products after the patch has cured to match the surrounding surface and enhance its appearance.
See Also
A Comprehensive Guide to Effective Concrete Crack Repair
Choosing the Right Epoxy Patch for Your Concrete Needs
Selecting the Ideal BANDě Compound for Concrete Patching