

Strong bonds are the foundation of durable concrete repairs. Over 90% of repair projects fail to last 20 years, with weak bonding causing more than half of these failures within just five years. Hydraulic cement stands out as a reliable solution. It sets quickly, even in damp conditions, making it ideal for emergency repairs. Unlike conventional materials, it forms a high-strength bond due to its unique C-S-H gel formation, ensuring lasting durability. Whether you’re addressing cracks or sealing leaks, hydro cement offers unmatched effectiveness.
Key Takeaways
Hydraulic cement sets quickly, making it perfect for urgent repairs. Use it to fix cracks and leaks effectively.
Proper surface preparation is crucial. Clean the area thoroughly to ensure a strong bond with the hydraulic cement.
Follow mixing and application guidelines closely. This ensures durability and long-lasting results in your repairs.
Hydraulic Cement Properties
Rapid Setting and Hardening
Hydraulic cement is renowned for its ability to set and harden quickly, making it an excellent choice for time-sensitive repairs. This rapid setting process occurs due to a chemical reaction between the cement particles and water. Here’s how it works:
Cement particles react with water, initiating the hydration process.
Crystals begin to form and interlock, creating a solid structure.
The mixture gradually hardens, gaining strength over time.
Hydration continues for days or even weeks, further enhancing durability.
Component | Role in Rapid Setting and Hardening |
|---|---|
Clinker | Composed of calcium silicates and aluminates, which react with water to initiate the hardening process. |
Gypsum | Added to control the setting time and prevent flash setting, ensuring the cement does not harden too quickly. |
The inclusion of calcium silicates and aluminates plays a critical role. Calcium silicates react with water to form calcium silicate hydrate, which provides strength, while calcium aluminates contribute to quick setting and water resistance. This unique combination ensures that hydraulic cement delivers reliable performance, even in challenging conditions.
Water Resistance and Durability
One of the standout features of hydraulic cement is its exceptional water resistance. This property makes it ideal for applications where water intrusion is a concern, such as repairing leaks or sealing cracks in damp environments. Laboratory tests have demonstrated its effectiveness in long-term waterproofing. For example, specimens mixed with water-repellent additives showed significantly reduced water penetration depths and absorption rates after 28 days of curing.
Name | Weight Difference (g) | Penetration Depth (mm) | Penetration Ratio (%) |
|---|---|---|---|
OPC | 4.58 | 6.13 | 100 |
ZWR1% | 2.48 | 4.93 | 50 |
ZWR3% | 1.49 | 3.38 | 30 |
ZWR5% | 1.1 | 0.02 | 20 |
The table above highlights how increasing the ZWR content in hydraulic cement significantly enhances its water resistance. By filling micro pores and creating a dense, impermeable structure, hydraulic cement ensures long-term waterproofing and protection against water intrusion.
In addition to water resistance, hydraulic cement offers remarkable durability. Its dense composition minimizes voids and capillaries, reducing the risk of cracking under freeze-thaw cycles or heavy loads. This makes it a reliable choice for both emergency repairs and permanent solutions in environments exposed to moisture or extreme conditions.

By combining rapid setting, hardening, and superior water resistance, hydraulic cement provides a versatile and effective solution for concrete repairs. Whether you’re addressing active leaks or reinforcing structures, its unique properties ensure strong bonds and lasting results.
Preparing for Repairing Concrete Cracks
Surface Cleaning Techniques
Before applying hydro cement, you must prepare the surface properly. A clean surface ensures a strong bond and effective repair. Follow these steps for optimal results:
Remove Loose Debris: Use a wire brush or a chisel to eliminate any loose concrete, dirt, or dust.
Wash the Area: Rinse the surface with water to remove any remaining particles. If necessary, use a pressure washer for stubborn debris.
Dry the Surface: Allow the area to dry completely. This step is crucial, especially in damp conditions, as moisture can weaken the bond.
Tip: Always inspect the area for any signs of contamination, such as oil or grease. These substances can interfere with the adhesion of the hydro cement.
Mixing Hydro Cement Properly
Mixing hydro cement correctly is vital for achieving strong repairs. Follow these guidelines to ensure the best results:
Use Clean Water: Always use uncontaminated water for mixing. Impurities can lead to significant deterioration of strength and durability. Contaminated water can cause chemical reactions that weaken the cement.
Follow Manufacturer Instructions: Adhere to the recommended water-to-cement ratio. Incorrect amounts can lead to weak patches vulnerable to freeze-thaw cycles and heavy loads.
Mix Thoroughly: Combine the cement and water until you achieve a uniform consistency. This ensures that all particles are activated and ready to bond effectively.
By following these surface cleaning techniques and mixing guidelines, you set the stage for successful repairing concrete cracks. Proper preparation leads to durable and long-lasting repairs.
Application Techniques for Strong Bonds
Filling and Packing Techniques
To achieve strong bonds with hydraulic cement, you must follow specific filling and packing techniques. Here’s a step-by-step guide to ensure effective concrete crack repair:
Remove Loose Material: Use a chisel and hammer to chip away any loose concrete or mortar around the crack. This step provides a stable base for the new cement.
Clean the Surface: Brush away dust and debris with a wire brush. A clean area promotes better adhesion.
Create a Suitable Profile: If the surface is smooth, roughen it to improve adhesion. This gives the new cement something to grip onto.
Dampen the Surface: Moisten the repair area with clean water just before applying the cement. This helps the cement set properly.
Prepare the Cement: Mix small batches of hydraulic cement according to the manufacturer’s instructions until you achieve a thick paste.
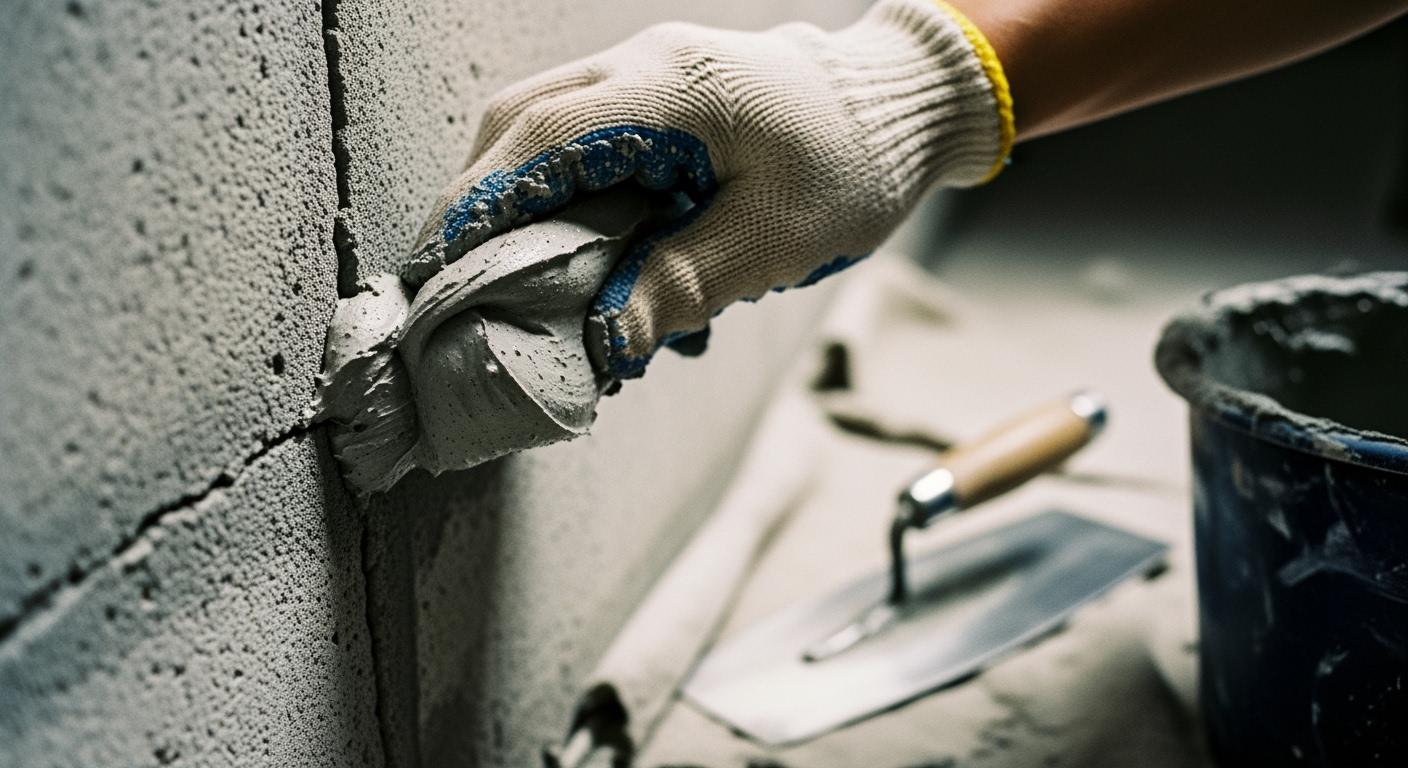
Apply the Cement: Use a trowel or your gloved hands to press the cement firmly into cracks or gaps. Ensure it’s well-packed.
Shape and Smooth: Quickly shape the cement and smooth the surface before it begins to set for a clean finish.
Allow to Cure: Keep the repaired area damp for at least 24 hours to ensure proper curing.
Tip: Mix small amounts of cement that you can use within two to three minutes due to its quick setting time. Always wear gloves and safety glasses when handling cement, as it can cause irritation.
Curing and Finishing Tips
Proper curing is essential for maximizing bond strength and durability. Follow these best practices:
Wet Curing: This method is recommended over dry methods. It helps maintain moisture, which supports strength development.
Mist the Area: After completing your repair, mist the repaired area with water periodically for 24 hours. This ensures the cement cures properly.
Avoid Drying Out: Keep the area covered with wet burlap or plastic sheeting to prevent moisture loss.
Monitor Temperature: If the temperature is high, consider using a curing compound to retain moisture.
Note: Proper curing helps maintain moisture, which is crucial for achieving strong bonds with hydraulic cement.
By following these application techniques, you can ensure effective leak stoppage and long-lasting repairs. Remember, the key to successful hydraulic cement work lies in preparation, execution, and proper curing.
In summary, achieving strong bonds with hydraulic cement requires careful attention to detail. You must follow proper techniques for surface preparation, mixing, and application. Consider methods like epoxy injection or Xypex crack repair for enhanced durability. Take your time during each step to ensure effective repairs that last.
Tip: Always remember that thorough preparation leads to successful repairs.
FAQ
What is hydraulic cement used for?
Hydraulic cement is ideal for repairing cracks, sealing leaks, and emergency patching in damp or underwater environments.
How long does hydraulic cement take to set?
Hydraulic cement typically sets within 15 to 30 minutes, allowing for quick repairs in urgent situations.
Can I use hydraulic cement in freezing temperatures?
Yes, hydraulic cement can cure in freezing temperatures, but ensure proper curing methods to maintain bond strength.
See Also
The Complete Guide To Durable Cement Crack Repairs
Epoxy Or Latex? Choosing The Best For Concrete Fixes
Essential Facts You Should Know About Concrete Bonding Agents
BANDě’s 2025 Tips For Selecting Top Concrete Bonding Agents
Understanding The Differences Between Hydraulic And Regular Concrete