
You are buzzing with excitement for your new bathroom, but have you thought about proper waterproofing? Skipping this crucial step invites mould, damp, and costly structural damage. Are you truly prepared for a bathroom that lasts? This guide helps you ensure a watertight, durable space using the right bathroom sealer and effective waterproofing techniques.
Key Takeaways
Waterproofing your bathroom is very important. It stops hidden water damage, protects your home’s value, and prevents mould that can harm your health.
Choose the right sealants for your bathroom. Use flexible silicone for joints and a strong membrane for large areas. This combination gives the best protection.
Apply sealants correctly. Clean surfaces well, use primer, and let everything dry fully. This stops costly mistakes and makes your bathroom last longer.
Why Bathroom Waterproofing is Crucial
The Hidden Dangers of Water Damage
You might not see it immediately, but water can cause serious problems behind your beautiful tiles. When water seeps into walls, floors, or cabinets, it weakens materials over time. Wood rots, drywall crumbles, and tiles loosen, compromising your bathroom’s structural integrity. You will notice paint blistering or peeling, and timber skirting boards can warp or swell. Water damage can even make your timber or laminate floorboards feel soft or uneven. Persistent leaks silently erode structural components like beams and joists, leading to sagging floors or warped walls. This is why proper waterproofing is so vital; it stops these hidden dangers before they start.
Protecting Your Home Investment
Neglecting proper waterproofing can significantly reduce your property’s value. Potential buyers often see neglected bathrooms as a sign of deeper, unseen issues like water damage, which can lead to lower offers or make selling your home difficult. Furthermore, if you need to claim on your insurance for water damage, they might deny it if the cause links back to poor maintenance or neglected issues like cracked grout. This means you bear all the repair costs yourself. Investing in good waterproofing now protects your home’s value for the future.
Preventing Mould and Health Risks
A bathroom is a high-moisture area, making it a prime spot for mould growth if you do not have adequate waterproofing. Mould is not just unsightly; it poses real health risks. You might experience a runny nose, irritated eyes, or skin, and even wheezing. For people with asthma, inhaling mould spores can trigger an attack. In rare cases, severe mould infections can occur, especially in the lungs. You need effective mould and mildew resistance and mould-proof protection to keep your family safe and your bathroom hygienic.
Understanding Bathroom Waterproofing Sealants
You need to understand the different types of bathroom waterproofing sealants available. These products protect your bathroom from water damage. You will find two main categories: full area waterproofing membranes and flexible joint and gap sealants. Each plays a vital role in creating a watertight space.
Full Area Waterproofing Membranes
These membranes create a continuous, impermeable layer over large surfaces. You can choose between liquid membranes and sheet membranes. Liquid membranes are paint-on solutions you apply with a roller or brush. Sheet membranes come in rolls you adhere to the surface. Consider these key differences:
Feature | Liquid Membrane | Sheet Membrane |
|---|---|---|
Lifespan | 10-15 years | Up to 20 years |
Application | Less precision, DIY-friendly | More complex, professional recommended |
Cost | More cost-effective upfront | More expensive initially |
Flexibility | More flexible, expands/contracts | Less elastic, less adaptable |
Cure Time | Requires drying (24-72 hours) | Installed and used more quickly |
Seams | Seamless, continuous layer | Requires seams, potential weak points |
Best For | Complex shapes, irregular surfaces | Large, flat surfaces, high-risk zones |
These full area bathroom waterproofing sealants form the primary barrier against water.
Flexible Joint and Gap Sealants
You use flexible joint and gap sealants, like silicone, for areas that experience movement. These include corners, around fixtures, and where different materials meet. A professional-grade neutral cure silicone sealant offers excellent waterproofing properties. It provides:
Joint Movement Capability: ±25%
Elongation at Break: >400%
Compliance: Meets AS/NZS and ASTM requirements for glazing and building sealants.
Adhesion: Compatible with various materials including glass, aluminium, timber, ceramics, masonry, and coated metals.
Silicone sealants are incredibly flexible. This flexibility is crucial. It accommodates temperature changes and structural movements without compromising the sealant’s integrity. This ensures long-term performance for your bathroom waterproofing.
The Role of Vapour Barriers
A vapour barrier is different from a full waterproofing membrane. It prevents moisture vapour from passing through walls and ceilings. You install it behind your wall linings. It stops condensation from forming within the wall cavity. This protects your home’s structure from dampness and mould. It complements your bathroom waterproofing sealants by managing moisture in a different way.
Selecting the Best Bathroom Sealer for Your Home
Choosing the right bathroom sealer is crucial for a lasting renovation. You need to consider several factors to make sure you pick the best products for your specific needs. This section helps you navigate the options, focusing on silicone sealants and a robust rigid waterproofing solution.
Key Factors for Sealer Selection
When you choose a bathroom sealer, you cannot just grab the first one you see. You need to think about where you will use it and what it needs to do. Here are the key things you should consider:
Factor | Description |
|---|---|
Substrate Compatibility | Different surfaces, like concrete, metal, glass, or wood, need specific sealants. Silicone sealants work great on glass and ceramics. |
Joint Movement Capability | Joints in your bathroom move because of temperature changes. Your sealant must stretch and shrink without cracking. Look for sealants with high movement capability, like silicones. |
Environmental Exposure | Think about how much water, heat, or cleaning chemicals your bathroom sealer will face. Indoor applications might need low VOCs. |
Application Conditions | The temperature and humidity when you apply the sealant matter. Some sealants need specific conditions to cure properly. |
Curing Time | How long does it take for the sealant to fully dry? Some cure quickly, which helps speed up your project. |
Durability and Lifespan | You want a sealant that lasts. High-quality options might cost more upfront but save you money in the long run. |
Aesthetics | Do you need a specific colour? Some sealants are paintable, but most silicone options are not. |
Cost | Your budget is important, but balance it with the performance you need. |
Regulatory Compliance | Make sure your chosen sealant meets building codes and safety standards. |
Adhesion | The sealant must stick well to the surface. Proper cleaning before application is essential for strong adhesion. |
Elasticity and Flexibility | This lets the sealant stretch and compress without breaking, which is vital for accommodating movement. |
Fungus and Mildew Resistance | In damp bathrooms, sealants with mould and mildew resistance are a must. |
Choosing the Best Silicone Sealant Options
Silicone sealants are often the best overall choice for many bathroom applications. They offer excellent waterproofing properties and flexibility. You will find them perfect for sealing around your shower, bath, and basin.
Here is why you should consider a high-quality silicone sealant:
Water Resistance: They form a tough, flexible, waterproof seal. Many are 100% silicone sealants, offering superior waterproofing.
Flexibility: They can handle significant joint movement, often up to ±50%. This means they remain elastic even after curing, accommodating expansion and contraction.
Mould Resistance: Many come with anti-fungal additives, providing lifetime mold protection and a hygienic finish. This is crucial for preventing mould and mildew resistance in wet areas.
When you look for the best silicone sealant, consider these popular and effective options:
EVO-STIK White for Life Shower & Bathroom Sealant: This sealant is known for its mould resistance, durable white finish, and ease of application. It is a great choice for your shower.
Gorilla Waterproof Caulk & Seal Silicone Sealant: This is a high-performing, clear caulk that offers superior waterproofing. It is a strong contender for any area needing a reliable seal.
BoPin 550 Sanitary Neutral Silicone Sealant: Tested in challenging climates, this sealant provides excellent performance and durability.
Bostik® 6S range: This neutral cure silicone sealant includes a fungicide to resist mould. It adheres well to various surfaces and cures into a flexible, durable seal.
Selleys® All Clear: This silicone caulk is flexible, waterproof, and resists mould and mildew growth.
GE Silicone and Loctite: Both are known for being waterproof, anti-mould, and having high moisture resistance with low VOCs.
SS100 Neutral Cure Sanitary Silicone: This sealant is specifically developed for bathroom applications and features superior mould resistance.
Selleys Wet Area Silicone: This product is formulated to withstand heat and moisture, offering mould-resistant protection.
These options provide the quality and performance you need for a long-lasting, waterproof bathroom.
Rigid Waterproofing Solutions: BANDě Sealer
While flexible silicone is great for joints, you also need a robust solution for full-area waterproofing. This is where a product like BANDě Rigid Waterproofing Sealer comes in. It offers a full-area, rigid waterproofing solution that provides high resistance to water and moisture.
BANDě Sealer ensures long-term durability and protection for your bathrooms. It is suitable for various substrates, which enhances its versatility. This type of sealant contributes to a healthier indoor environment by preventing mould and mildew growth. It complements your flexible silicone caulk by creating a strong, impermeable barrier over large surfaces.
Making the Best Overall Choice for Your Project
To make the best overall choice for your bathroom, you should combine both flexible and rigid solutions. Use a high-quality silicone caulk for all your joints, corners, and around fixtures. Then, apply a rigid waterproofing membrane like BANDě Sealer to your floors and walls before tiling. This dual approach gives you comprehensive waterproofing, ensuring maximum performance and durability. This combination protects your home from water damage and keeps your bathroom looking great for years.
Applying Your Bathroom Sealer Correctly
You have chosen the right products, and now it is time to put them to work. Applying your bathroom sealant correctly is just as important as selecting the right one. You need to follow each step carefully to ensure your bathroom remains watertight and looks fantastic for years.
Essential Surface Preparation
Before you even think about applying any sealant or membrane, you must prepare your surfaces properly. This step is absolutely critical for the long-term performance of your waterproofing.
First, you need to clean the surface thoroughly and dry it completely. You should remove all dirt, dust, and loose material. You can use a wire brush or a vacuum for this. Make sure no moisture remains, as dampness can seriously compromise your waterproofing.
Next, you must repair all imperfections. Fill any cracks wider than 1mm with a flexible, waterproof filler. You should also seal all penetrations and movement joints with an approved sealant, ensuring complete coverage. Smooth any rough edges to create an even base.
Finally, you need to prime the surface appropriately. You should apply the primer recommended for your specific surface evenly and allow it to dry completely before applying the membrane. Skipping primer can lead to 80% of adhesion failures, so do not miss this step! Priming controls substrate porosity, consolidates residual dust, and offers better mechanical results. You can apply it with a paintbrush or broom, and it usually dries in about 15-30 minutes. For your shower, you will also need wet area tape. This is essential for sealing surface joints to prevent leaks. Use a good quality product for strong adhesion and coverage over floor and wall joints, under shower grates, and outlets. You can apply it on wet area grade plasterboard.
Applying Waterproofing Membranes
Once your surfaces are perfectly prepared, you can start applying your waterproofing membranes. This is where you create the primary barrier against water.
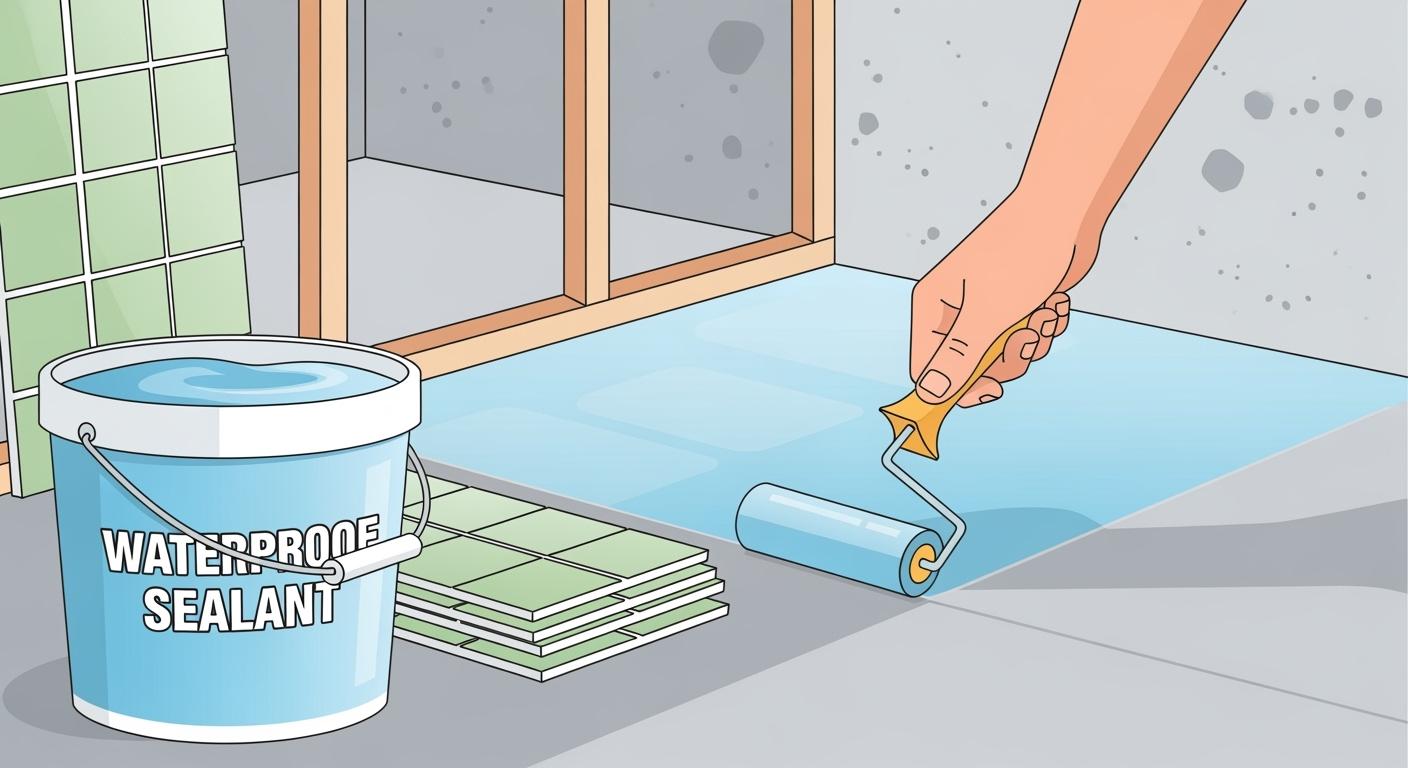
When you apply liquid waterproofing membranes, achieving the correct application thickness is crucial. Applying it too thin or too thick can lead to issues like inadequate coverage, uneven curing, or sagging. You must strictly follow the manufacturer’s specific mixing ratios and application instructions. Use appropriate tools such as brushes, rollers, or sprayers, as the manufacturer recommends.
You should apply the membrane at a uniform thickness to prevent premature failure, as outlined in AS 4654.2. Utilise tools like a notched trowel or roller to ensure consistency. You can even use devices such as a PosiTector or a Wet Film Thickness gauge to achieve the required thickness and ensure even application. Achieving consistent membrane thickness requires skilled labour and attention to detail. Use appropriate tools and monitor the membrane during and after application to avoid inconsistencies. This careful application is vital for the long-term performance of your waterproofing entire shower areas.
Precision in Sealing Joints and Gaps
Now, you need to focus on the joints and gaps where flexibility is key. This is where your silicone sealant comes in. Precision here ensures a watertight seal for your shower and bathtub sealing.
First, you need to remove any old silicone. Use a silicone remover or a blade, clean the area with alcohol, and let it dry completely. Then, apply masking tape on both sides of the joint. This helps you achieve a clean, straight line and a professional finish.
Next, you can apply the new silicone. Cut the tube at a 45° angle, load it into the caulk gun, and apply it smoothly and evenly along the joint. Hold the caulk gun at a consistent angle and apply a smooth, continuous bead along the gap, moving steadily to avoid uneven application. For deep gaps, you might need to apply multiple layers, allowing each to dry.
After applying the caulk, you need to smooth it out. Use a finishing tool or a finger dipped in soapy water to smooth the bead and push it into the joint. Immediately remove the masking tape after smoothing to prevent uneven finishes. This careful application of caulk ensures a high-quality seal.
Curing Times and Quality Checks
You have done all the hard work, but you are not quite finished yet. The curing process is just as important as the application itself.
Waterproofing products should be allowed at least 24 hours to dry to ensure a proper seal. General waterproofing typically requires 24-48 hours to fully cure before tiles or other floor coverings can be laid. The exact curing time can vary depending on the specific product you use. For initial cure in submerged areas or showers, it is typically within 6-7 days, as per specific product recommendations.
Several factors can affect curing time, including temperature, humidity, and airflow. You must avoid heavy water exposure or traffic during the curing period to maintain membrane integrity. The entire bathroom waterproofing process, including all drying times, generally takes 2-3 days to complete. Always check the manufacturer’s instructions for specific curing times for your chosen sealant and membrane. This attention to detail ensures the best performance and longevity for your bathroom.
Common Waterproofing Mistakes to Avoid
Even with the best intentions, you can make mistakes that compromise your bathroom’s waterproofing. Knowing these common pitfalls helps you avoid costly repairs and ensures a long-lasting, watertight space.
Inadequate Surface Preparation
You might think you can skip a step or two, but inadequate surface preparation is a major culprit for waterproofing failures. If you do not clean and prepare surfaces properly, you will face poor adhesion and coverage. This significantly reduces the lifespan of your waterproofing system. Early deterioration and failure are common, leading to frequent repairs and increased maintenance costs. Water damage, including rotting wood and crumbling drywall, becomes a common and expensive problem. You also face an increased risk of leaks, mould, and mildew, compromising both appearance and functionality.
Skipping Primer or Insufficient Coverage
Skipping the primer or applying insufficient coverage is another critical error. This constitutes subpar workmanship. You must avoid shortcuts; surfaces need to be clean, dry, and primed before waterproofing. Failure to do so can lead to significant hidden costs and compromise the entire waterproofing system from the outset. Inadequate priming leads to membrane failures and weak adhesion. Also, insufficient dry film thickness in liquid membranes, often from guesswork, leaves them vulnerable to pinholing, cracking, or UV damage. This directly breaches Australian Standard AS 4654.2.
Overlooking Critical Areas
You might focus on the main floor, but critical areas are often overlooked. Pipes and drains frequently create weak points if sealing is rushed or skipped. Substrate degradation, especially in older bathrooms, is a silent killer. A broken seal leads to structural rot or cement swelling, shifting floor levels. That is why subfloor damage from leaking showers is so dangerous. You must thoroughly waterproof shower areas on the floor and walls up to 1.8 metres, extending the membrane at least 150mm above the shower outlet. Floor waste outlets need correct integration into the waterproofing membrane system. Wall-floor junctions are vulnerable and require a flexible, continuous membrane, extending at least 150mm up from the floor. All penetrations for plumbing and fixtures are potential weak points; you must seal them with compatible, flexible caulk, considering potential movement. Neglecting corners and joints, or having no slope towards drainage points, also invites trouble.
Rushing the Curing Process
You have applied your waterproofing, but rushing the curing process is a huge mistake. Skipping proper curing time between coats or tiling too soon before the membrane is fully cured leads to waterproofing failures. Inconsistent membrane thickness due to rushing creates weak spots susceptible to water penetration. Waterproofing failures are a leading cause of building defects, with repairs for a failed shower typically costing between £10,000 and £30,000. Interfering with the waterproofing layer before it fully cures disrupts the necessary chemical reactions for its effectiveness. This often necessitates reapplying the waterproofing, leading to wasted effort, additional time, increased expenses, and stress. You must allow the caulk and membranes to cure fully. Applying too much caulk in a single coat can result in improper curing and cracking. Disregarding cure times is a critical error; the membrane needs sufficient time to achieve its physical properties. Exposing a membrane to water, foot traffic, or covering it with tiles before it has fully cured can cause irreversible damage.
Proper pre-tiling waterproofing is not just an option; it is a fundamental requirement for your bathroom renovation. It prevents costly damage, ensures hygiene, and preserves your property’s value. You should view waterproofing as an investment, not an expense. This empowers you to make informed decisions for a beautiful, mould-free bathroom with lasting durability.
FAQ
How often should I check my bathroom seals?
You should regularly check your caulk and seals for wear. Good maintenance prevents a failing shower seal. This keeps your shower watertight and looking great.
What are the signs I need to reseal my shower?
Look for cracks, peeling, or discolouration in your caulk. These are clear signs you need to reseal my shower. Prompt maintenance protects your bathroom from water damage.
Can I just caulk over old caulk?
No, you should always remove old caulk first. Clean the surface thoroughly before applying new caulk. This ensures a strong, lasting seal for your shower, reducing future maintenance.
See Also
Achieving a Mould-Free Shower: Professionals’ Secret Weapon Behind Your Tiles
Your Essential DIY Guide: Fortifying Basements Before the Flood Season Arrives
Alkali-Resistant Primer: The Essential Step Before Painting Your Fresh Plaster
A Comprehensive Guide to Effective Concrete Waterproofing Techniques and Solutions
Is Your Paint Peeling? You’re Likely Skipping This Crucial Primer Step