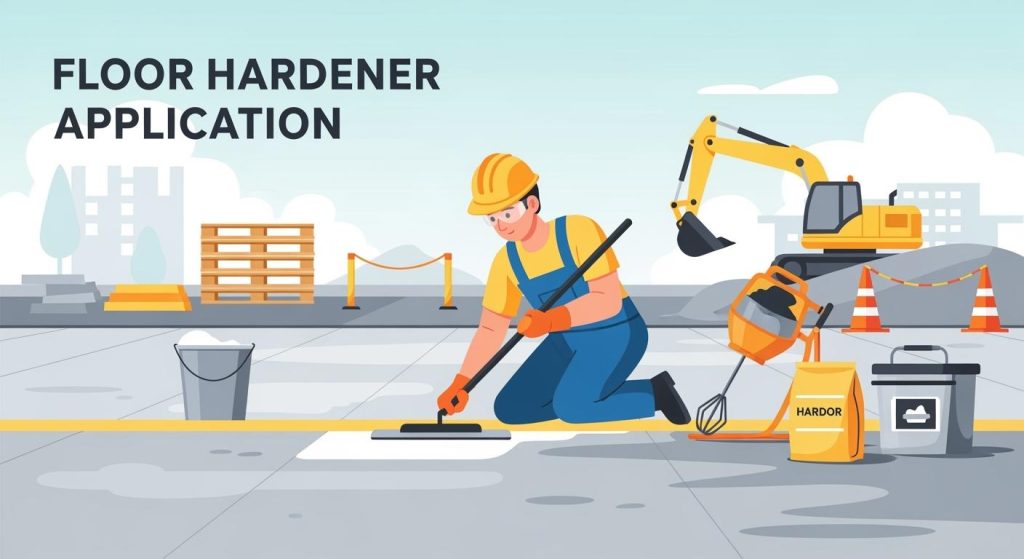

Floor hardeners play a vital role in enhancing concrete durability. They can significantly increase abrasion resistance by 32% and impact resistance by 13%. However, challenges like incorrect application rates and environmental factors can hinder effectiveness. Following the right techniques ensures you achieve sound results and increased durability.
Key Takeaways
Proper surface preparation is essential; clean and inspect the concrete to ensure effective hardener application.
Use the correct mixing ratios for floor hardeners; this ensures optimal performance and longevity of your concrete surface.
Regular maintenance, including cleaning and periodic reapplication of hardeners, extends the lifespan of your concrete floors.
Types of Floor Hardeners
When it comes to choosing a floor hardener, understanding the different types available can make a big difference in your project. Let’s dive into three main categories: chemical, metallic, and synthetic hardeners.
Chemical Hardeners
Chemical hardeners are often liquid-based solutions that penetrate the concrete surface. They work by reacting chemically with the concrete to increase its density and durability. These hardeners are great for dust control and provide chemical resistance, making them ideal for environments where spills might occur. However, proper application is crucial to achieve the best results.
Metallic Hardeners
Metallic hardeners, on the other hand, contain metal aggregates that enhance the strength and abrasion resistance of the concrete. They are perfect for heavy-duty industrial environments where high impact and wear are common. While they offer excellent performance, they can be more expensive and may have rusting issues if not maintained properly.
Composition | Performance Characteristics | Suitable Environments | |
|---|---|---|---|
Metallic | Metal aggregates | Extremely high strength and abrasion resistance | Heavy-duty industrial environments |
Non-metallic | Mineral aggregates | Excellent hardness and durability, rust-free | Wet and humid environments, commercial |
Synthetic Hardeners
Synthetic hardeners are a versatile option, often made from polymers or resins. They provide a strong, durable surface and are typically cost-effective. These hardeners are suitable for various applications, including residential and commercial spaces. They can also be used in conjunction with other types of hardeners for enhanced performance.
Tools for Floor Hardener Application
When it comes to applying floor hardeners, having the right tools can make all the difference. Here’s a breakdown of essential equipment you’ll need for a successful application.
Application Tools
Concrete grinder with diamond tooling for surface preparation
Shot blaster for larger areas
Industrial vacuum cleaner for dust removal
Pressure washer for thorough cleaning
Low-pressure sprayer for even distribution of hardener
Microfiber applicators or mops for smooth spreading
Squeegee for moving excess material
Clean buckets for mixing or holding hardener
Using these tools ensures proper bonding, a smooth finish, and high surface density, which increases durability and resistance to wear.
Safety Gear
Safety should always come first! Here’s what you need to protect yourself during the application process:
Safety glasses or goggles
Chemical-resistant gloves
Respirator for poor ventilation
Long-sleeved shirts and pants
Sturdy safety boots
Make sure to ensure cross-ventilation by opening windows and using fans. This helps maintain air quality and keeps you safe while working.
Surface Preparation Materials
Proper surface preparation is crucial for effective hardener application. The concrete should be at least 14 days old before applying the hardener. Ensure the surface is free of bleed water and strong enough for finishing.
By using the right tools and materials, you set the stage for a durable and long-lasting concrete floor. Happy applying!
Step-by-Step Guide to Application
Surface Preparation
Before applying a floor hardener, proper surface preparation is essential. Here’s a simple checklist to follow:
Initial Cleaning: Start by removing all dust, dirt, and loose material. Use an industrial vacuum cleaner or a brush. If there are stubborn residues, a pressure washer might be necessary.
Surface Inspection: Check for cracks, spalling, or other damage. If you find any issues, repair them with appropriate concrete repair products.
Surface Preparation: Ensure the surface is clean, sound, and dry. This may involve grinding the concrete to open its pores, allowing better penetration of the floor hardener.
Following these steps will set a solid foundation for your application procedures.
Mixing and Application
Once your surface is ready, it’s time to mix and apply the floor hardener. Here’s how to do it effectively:
Mixing Ratios: Different types of floor hardeners require specific mixing ratios. Here’s a quick reference table:
Mix Ratio | Application Description |
|---|---|
1:1 | Common for quick-curing, same-day systems like epoxy flooring used in garages and small spaces. |
2:1 or 3:1 | Typical for industrial-strength coatings that need more resin for chemical resistance and durability. |
Variable | Specialty products, like metallic floors or UV-stable coatings, use complex ratios tailored for appearance and performance. |
Application Techniques: Use a low-pressure sprayer for even distribution. Apply the hardener in a consistent manner, ensuring that you cover the entire surface without leaving any gaps. A microfiber applicator or mop can help achieve a smooth finish.
Curing Techniques
Curing is a critical step that ensures the durability of your concrete floor. Here are some recommended curing methods:
Curing Method | Description | Best For |
|---|---|---|
Water Curing | Keep the surface wet using methods like ponding or sprinkling. | Roof slabs, flooring, and columns. |
Membrane Curing | Spray curing compounds to create a film that retains moisture. | Large projects and remote areas. |
Steam Curing | Use hot steam to speed up strength gain. | Precast beams, blocks, and pipes. |
Proper curing helps maintain moisture levels and prevents early traffic, which is crucial for achieving the desired properties of concrete. Start curing as soon as possible after finishing and stamping. Keeping the concrete surface wet for at least seven days is still the best way to cure concrete.
By following these step-by-step instructions, you can ensure a successful floor hardener application that results in a durable and long-lasting concrete surface.
Common Mistakes in Concrete Floor Hardening
When it comes to applying a floor hardener, even small mistakes can lead to big problems. Let’s explore some common pitfalls and how to avoid them.
Incorrect Mixing Ratios
One of the most frequent mistakes is using incorrect mixing ratios. This can seriously affect the performance and longevity of your concrete floor. For instance, improperly mixed epoxy can lead to issues like peeling, bubbling, or fading within just a few months. In contrast, a correctly mixed and cured coating can last 15 to 20 years with minimal upkeep.
Here are some common mixing mistakes to watch out for:
Using improper mixing tools, like a household drill instead of a low-speed, high-torque mixer.
Not following the manufacturer’s mixing specifications, which can lead to inconsistent results.
Confusing weight with volume when measuring components, resulting in incorrect ratios.
Mixing components from different products, which can cause curing issues.
To avoid these problems, always adhere to the exact proportions specified by the resin manufacturer. Remember, there’s little room for error when it comes to mixing ratios!
Inadequate Surface Preparation
Another major mistake is inadequate surface preparation. Poor preparation is a leading cause of concrete coating failure, often resulting in peeling and delamination. Contaminants like oil stains, wax-based cleaning products, and dust can hinder proper adhesion of the hardener.
To ensure effective penetration of the hardener, follow these steps:
Clean the area thoroughly to remove dirt, grease, or old coatings.
Perform a water-break test after cleaning to identify any remaining contaminants that could affect adhesion.
Make sure the concrete is at least 14 days old before applying the hardener.
By taking the time to prepare the surface properly, you set the stage for a successful application.
Neglecting Curing Time
Finally, neglecting proper curing time can have serious consequences. Concrete that dries out prematurely stops gaining strength, becomes more porous, and loses surface durability. It’s crucial to remember that concrete achieves about 70% of its strength in just 7 days, but it requires 28 days or more for full curing.
Here’s what can happen if you don’t allow enough curing time:
Early placement of weight can lead to indentations, microcracking, and surface failure.
Insufficient curing can stop strength gain and increase porosity.
To avoid these issues, ensure that you keep the concrete surface wet for at least seven days after application. This will help maintain moisture levels and prevent early traffic, which is essential for achieving the desired properties of your concrete floor.
By being aware of these common mistakes and taking steps to avoid them, you can ensure a successful floor hardener application that results in a durable and long-lasting concrete surface.
Maintenance for Durable Floors
Maintaining your concrete floors is key to ensuring their longevity and durability. Here are some essential practices to keep them in top shape.
Regular Cleaning
Regular cleaning is crucial for preventing dirt and grime buildup. Here are some effective methods to consider:
Broom or Vacuum: Regularly remove dirt and debris to prevent abrasions on your concrete floors.
Mop with a Removable Head: This is essential for removing fine particles and maintaining indoor concrete floors.
pH-Neutral Cleaners: Use these to clean without harming sealed or polished surfaces.
Keeping your floors clean not only enhances their appearance but also extends their lifespan. Preventive flooring care can extend replacement cycles by 30-50%, showing just how impactful regular maintenance can be.
Periodic Reapplication
To maintain optimal durability, periodic reapplication of floor hardener is necessary. The lifespan of a sealer varies based on traffic and environmental exposure. Look for signs of wear, such as dullness or reduced water beading. A simple water test can indicate the need for reapplication: if water soaks in instead of beading, it’s time to reapply. Most acrylic sealers require reapplication every 1-3 years, while penetrating sealers can last 5-10 years or more.
Monitoring for Damage
Regular inspections help catch any issues early. Here are some tips for monitoring your floors:
Spot Repair: Address minor damages like cracks or chips promptly to prevent them from worsening.
Environmental Conditions: Keep an eye on factors that may affect the floor, like humidity and temperature.
Establishing a monitoring program is essential for assessing the condition of concrete floors over time. Conducting regular assessments helps facility managers plan for repairs and budget effectively.
By following these maintenance practices, you can ensure your concrete floors remain durable and visually appealing for years to come.
In summary, mastering the application of floor hardeners is crucial for achieving durable concrete surfaces. Key takeaways include:
Proper surface preparation is vital; contaminants can hinder penetration.
Correct application rates matter; too much or too little can cause uneven hardening.
Environmental factors like temperature and humidity affect hardener effectiveness.
Ongoing maintenance also plays a significant role in extending the lifespan of your floors. Regular upkeep not only prevents wear and tear but also saves money on major repairs. By following these practices, you can ensure your concrete surfaces remain strong and safe for years to come.
FAQ
What is the best time to apply floor hardener?
The ideal time is when the concrete is at least 14 days old and fully cured for optimal results.
How long does a floor hardener last?
Typically, a well-applied floor hardener can last anywhere from 5 to 20 years, depending on traffic and maintenance.
Can I apply hardener on old concrete?
Yes, but ensure the surface is clean, sound, and properly prepared for effective adhesion.
See Also
Understanding BANDě Concrete Floor Hardener: Essential Insights
Choosing the Ideal Concrete Floor Hardener for 2025
Comprehensive Guide to Choosing BAND Concrete Floor Hardener in 2025