You want your concrete floors to last, right? Proper concrete hardener application is crucial for durable, dust-free, and aesthetically pleasing surfaces. This guide gives you an up-to-date roadmap for optimal results, covering best practices for new and existing concrete floors.
Dry-shake hardeners… can double or triple service life compared to untreated slabs.
This comprehensive guide helps you overcome common challenges, ensuring your investment pays off.
Key Takeaways
Prepare your concrete floors well before applying hardener. Clean and repair surfaces to ensure the hardener works best.
Apply concrete hardener carefully. Follow mixing instructions and use the right tools for even coverage.
Protect your concrete floors after applying hardener. Allow proper drying and curing time for long-lasting results.
Understanding Concrete Hardeners and Surface Preparation for Optimal Concrete Floors
Proper surface preparation is crucial for the best results when you apply concrete hardener. This section gives you the foundational knowledge about concrete hardeners and the essential steps to prepare your concrete floors for application.
Concrete Hardener: Definition and Key Benefits
A concrete hardener is a chemical solution you apply to concrete surfaces. It penetrates the concrete, reacting with its components to create a denser, harder, and more durable surface. Think of it as giving your concrete a super shield!
Using a concrete hardener offers many benefits. It provides rich, vibrant color and offers long-lasting durability. This treatment strengthens and colors only the surface during finishing. You get a floor that resists abrasion, reduces dusting, and stands up to heavy traffic much better than untreated concrete. This means your concrete floors will look better and last longer.
Types of Concrete Hardeners, Including Dry Shake Hardeners
You will find different types of concrete hardeners available, each with unique properties. The most common types include:
Liquid Chemical Hardeners: These are typically silicate-based (sodium, potassium, or lithium silicates). You spray them onto the concrete surface, and they penetrate to react with calcium hydroxide, forming a dense, crystalline structure.
Dry Shake Hardeners: These are powdered materials you broadcast onto fresh concrete during the finishing process. They contain cement, aggregates, and sometimes pigments. Dry shake hardeners are excellent for high-traffic areas.
Specific applications of dry shake hardeners include:
Industrial floors
Warehouses
Retail spaces
Commercial floors
Other high-traffic areas
Dry shake hardeners offer many advantages. They create a dense, hard, and abrasion-resistant surface. You get enhanced durability, resistance to wear and chemicals, and an improved surface finish. This makes them a top choice for demanding environments.
Assessing Existing Concrete Floors and Surface Conditions
Before you apply any concrete hardener, you must thoroughly assess your existing concrete floors. This step helps you identify potential issues and ensures the best possible outcome. You need to look at several key indicators:
Constituent Material Properties: The chemical makeup and performance of cement, aggregates, and water can vary. This impacts the overall concrete quality.
Mix Design: The proportions, mixing order, method, and time between mixing and placing all affect the final quality of the concrete.
Environmental Conditions: Factors like ground and air temperatures, wind speed, cloud cover, and the absorbency of the substrate during placement, finishing, and curing influence concrete development.
You can also evaluate concrete surface porosity and hardness using specific tests. The Rebound Hammer Test (Schmidt’s Hammer Test) is a non-destructive way to assess concrete strength based on surface hardness. It involves a spring-controlled plunger and a hammer that impacts the concrete surface. A graduated scale measures the rebound number. A lower rebound number indicates lower compressive strength and stiffness. This test is quick and simple, though its accuracy can be influenced by surface smoothness, water content, aggregate type/size, and carbonation.
The Penetration Resistance Test (Windsor Probe Test) determines the relative strength of concrete structures. It measures the penetration depth of a probe driven into the concrete. The penetration depth correlates with compressive strength. This test is useful for evaluating poor quality and deterioration. While it can yield variable results, requiring multiple shots for an average, it is a quick way to assess concrete quality and maturity.
Country / Region | Standard Code | Title / Description |
|---|---|---|
India 🇮🇳 | IS 13311 (Part 2): 1992 | Non-destructive testing of concrete – Rebound Hammer |
USA 🇺🇸 | ASTM C805 / C805M | Standard Test Method for Rebound Number of Hardened Concrete |
Europe 🇪🇺 | EN 12504-2: 2021 | Testing concrete in structures – Part 2: Non-destructive testing – Rebound Hammer |
International 🌍 | BS 1881: Part 202: 1986 | Testing Concrete – Recommendations for Rebound Hammer Test |
International 🌍 | ACI 228.1R | In-place Methods to Estimate Concrete Strength (includes rebound hammer guidance) |
Thorough Cleaning and Repairing Concrete Surfaces
You must thoroughly clean and repair your concrete surfaces before applying concrete hardener. This step ensures proper adhesion and a smooth finish. Remove all dust, loose dirt, debris, and standing water. For new concrete, allow a minimum of 28 days to cure before application.
For existing concrete, you might encounter stains. Here are effective techniques for removing oil stains and contaminants:
Chemical Cleaners: Alkaline cleaners (pH above 7) are ideal for emulsifying oils and greases. You commonly use them on driveways and garage floors. Neutral pH (around 7) cleaners are for light-duty tasks or maintenance cleaning. Understanding the pH scale is critical for selecting the correct chemical. Advanced service providers often test both the contaminant and the surface before choosing a chemical protocol.
Mechanical Cleaning: Rotary surface cleaners provide uniform pressure distribution across wider areas. This minimizes streaking and gouging, especially useful for large commercial settings. Advanced hot water pressure washers, capable of reaching temperatures over 200°F, effectively break down grease and stubborn organic materials. Newer models integrate vacuum recovery systems to capture wastewater and contaminants for proper disposal.
Specialized Treatments: Poultice applications draw contaminants out of concrete pores via capillary action. These are effective for localized stains. Oxidizers and reducers (e.g., hydrogen peroxide or sodium metabisulfite) chemically alter stains for easier extraction. Micro-abrasion or low-pressure media blasting can supplement chemical strategies for deep-set stains.
Professional Products: Professional-grade products like GK Oil Out are specifically engineered for petroleum stain removal on porous surfaces. They outperform DIY methods. GK Oil Out has an oil-ingesting formula designed for removing petroleum-based oil and grease stains from block paving and concrete. Its super concentrated formula pushes oil out from deep within the pores, removing contamination without leaving residue. The product’s low surface tension allows deep penetration to the molecular level, ensuring complete stain removal. GK Oil Out is biodegradable and surface-safe. It is engineered to be tough on oil while remaining safe for common driveway materials.
Preparation: Sweep the stained area to remove loose debris.
Application: Apply GK Oil Out directly to the oil stain without dilution.
Activation: Allow 1 hour for the formula to penetrate and emulsify the oil.
Rinsing: Rinse thoroughly with hot water or a low-pressure washer.
Repeat if Necessary: For extremely old or heavy stains, a second application ensures complete removal.
Pressure Washing: A 1,300 to 2,000 PSI pressure washer is recommended for residential concrete surfaces. Use 25-degree nozzles to prevent surface damage on older concrete. Start pressure washing from the outside edges of stains and work toward the center to prevent contamination spread. Maintain a 12-inch distance from concrete surfaces during pressure washing to avoid etching damage. Hot water pressure washing increases effectiveness by 40% compared to cold water methods for heavy stains.
Other Cleaners: Commercial degreasers containing surfactants effectively break down petroleum-based construction stains. Apply degreaser at full strength on oil stains, let it sit for 20 minutes, then scrub with stiff brushes. Muriatic acid effectively removes rust stains but requires protective gear. Cat litter absorbs fresh oil spills within 24 hours if applied immediately. Baking soda mixed with water removes light dirt stains but is ineffective against deep oil penetration. White vinegar breaks down mineral deposits and efflorescence but lacks the chemical strength for industrial-grade stains. A vinegar and water mixture works on fresh paint spills within the first hour. Natural solutions are cheaper but often require multiple applications and extended treatment times.
You must also repair any cracks, pitting, or spalling in the concrete. Do not simply ‘paint over’ problems; fix them first. Ensure the new floor is smooth and firm after repairs.
Ensuring Proper Surface Profile and Moisture Content
Achieving the correct surface profile and moisture content is vital for successful concrete hardener application. For epoxy floor surface preparation, mechanical grinding or shot blasting creates a concrete surface profile (CSP) of 1-3. This range provides sufficient texture for mechanical bonding, crucial for hardener adhesion. Mechanical grinding is the recommended solution for achieving a proper concrete profile, typically a CSP-2 to CSP-3, for most systems. This range is essential for ensuring adequate adhesion of epoxy coatings, including the hardener.
You also need to check the moisture content. Epoxy flooring systems, which include hardeners, can be applied over concrete with relative humidity levels up to 100%. Some formulations are even suitable for physically damp concrete. This is particularly relevant for areas with high humidity. You can use several tests to measure moisture:
ASTM F1869 (calcium chloride testing)
ASTM F2170 (relative humidity testing)
ASTM F3010-13 (performance criteria for moisture mitigation systems)
Optimal surface temperature for application is between 54-77°F (12.2-25°C). This temperature range helps the concrete hardener cure properly and achieve its full potential.
Applying Concrete Hardener and Post-Application Care for Longevity
This section details the step-by-step application process for concrete hardener. It also covers crucial post-application care. This ensures maximum durability and performance for your floors.
Safety Precautions and Accurate Product Mixing
You need to prioritize safety when you work with chemicals. Always wear appropriate personal protective equipment (PPE). This includes safety glasses or goggles, chemical-resistant gloves, and long-sleeved clothing. If you work in an enclosed space, make sure you have good ventilation. You might even need a respirator. Read the product’s Safety Data Sheet (SDS) before you start. It gives you all the important safety information.
Accurate mixing is super important for your concrete hardener to work right. Don’t guess! Manufacturers design their products with specific ratios. If you mess up the mix, your hardener might not cure properly. It could stay sticky or not harden at all.
For example, if you use MAPEI Kerapoxy CQ Part B, you follow these steps:
Prep the tile joints. Make sure they are dry, clean, and dust-free.
Pour Part B into Part A. Mix slowly until it’s smooth with no streaks.
Work in small areas. Apply the epoxy grout using an epoxy float.
Clean promptly. Use clean water and white scrub pads to avoid haze.
Allow full cure. Follow the manufacturer’s cure times before you use the area.
Key mixing guidelines for MAPEI Kerapoxy CQ Part B include:
Combine the full Part B into the full Part A. This ensures the correct chemical reaction and color consistency.
Use a low-speed mixer or a drill with a paddle.
The safest method is to pour all of Part B into the container of Part A. Mix the full kit to follow the exact ratio the manufacturer designed.
Mix slowly around the bucket until everything blends into a smooth, creamy paste.
Be aware of the ‘pot life.’ This is the workable time of the material in the bucket. Exceeding this can lead to poor adhesion or weak joints.
Avoid common mistakes. Don’t guess amounts or skip thorough mixing. The manufacturer designs specific ratios to work together.
If you are using E903SL Urethane Slurry, you have a different process:
Use pre-measured kits. Use the entire kit; do not modify it.
Pour Part A into a five-gallon mixing vessel.
If you add color, add one bag of powder pigment to Part A. Mix for about 15 seconds. Use a 1/2″ drill and a jiffy-type mixing paddle.
Add Part B. Mix again for about 15 seconds.
Gradually add all contents from the provided aggregate filler bag into the liquid mixture. Blend thoroughly until all particles are wetted out. This takes approximately two minutes.
Use slow-speed mixing equipment. This avoids adding air into the mix.
After initial mixing, transfer the material to another pail (the transfer pail). Remix it.
Apply the product immediately after it is completely mixed. Remix occasionally to prevent aggregate settling.
Here’s a quick look at some specifications for E903SL Urethane Slurry:
Feature | Specification |
|---|---|
Mix Ratio | For a 1 Unit Kit: 7.25 lbs Part A, 7.25 lbs Part B, 29 lbs aggregate blend Part C + 1 lb dry pigment |
Pot Life | 15 minutes |
Recommended Mixer | JIFFY MIXER style drill mixer |
Mixing Precautions | Do not use a paint mixer or hand mix; improper mixing can lead to streaking, curing problems, and soft areas. |
This careful mixing ensures your concrete hardener performs as expected.
Application Techniques for Even Coverage on Concrete Floors
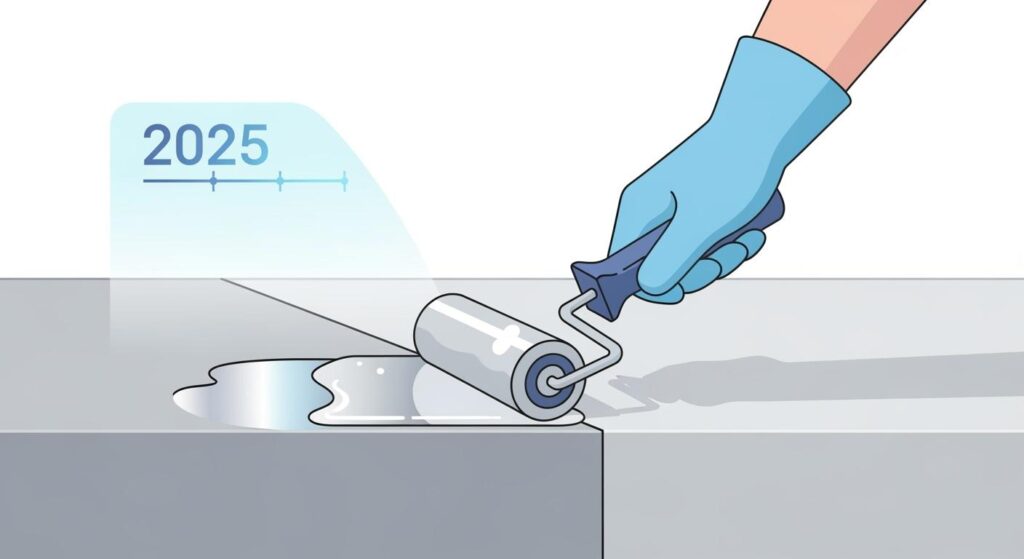
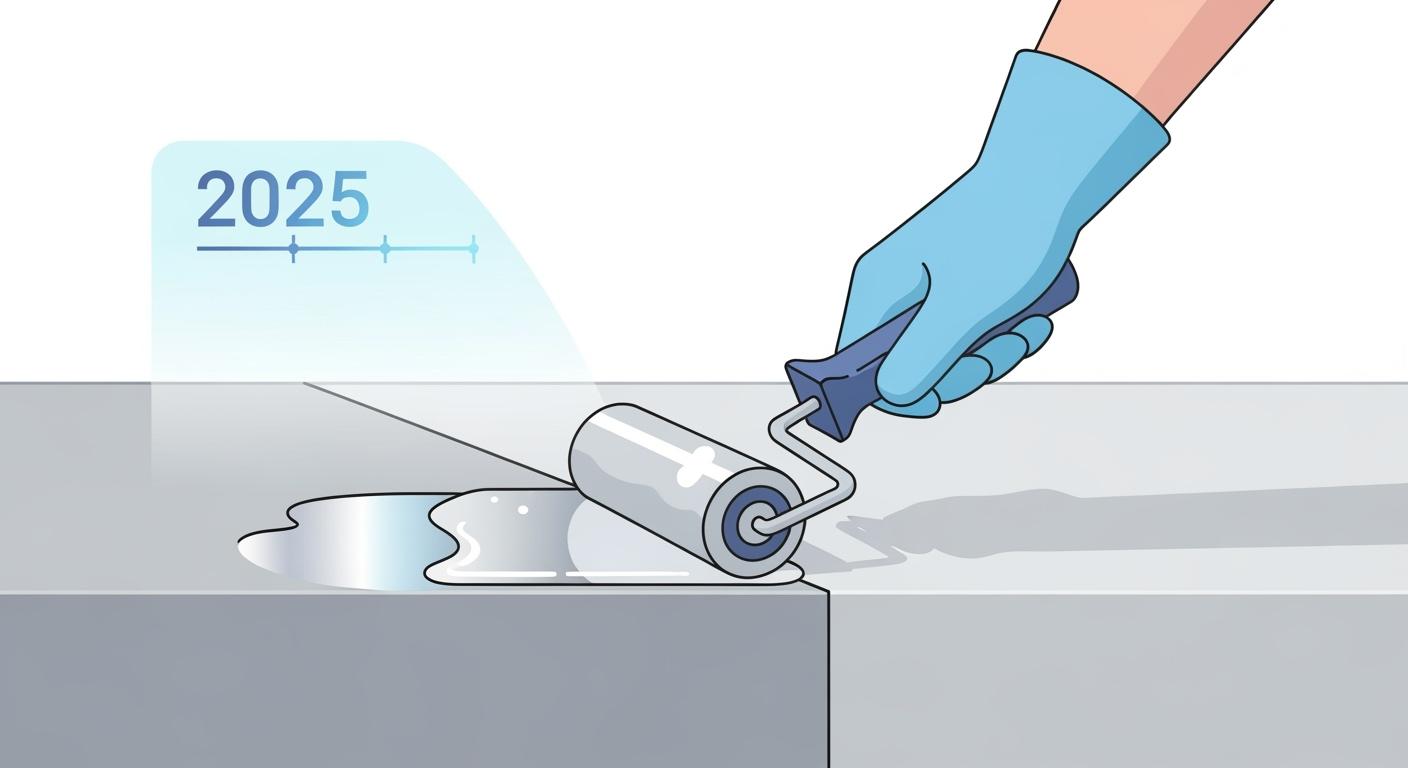
Once you have your concrete hardener mixed, you need to apply it correctly. Different application methods work best for different products and situations. For liquid hardeners, you typically use a low-pressure sprayer. This helps you get an even coat. You can also use a roller or a soft-bristle broom. Make sure you spread the product uniformly across the entire surface of your concrete floors. Avoid puddling. Puddles can leave darker spots or uneven hardening.
When you use dry shake hardeners, you broadcast the powder onto fresh concrete. You do this during the finishing process. You need to apply enough dry shake to get the desired effect. This usually means two or three passes. Make sure you spread it evenly. Then, you work it into the concrete surface with a power trowel. This ensures the hardener becomes part of the top layer.
The application rate varies depending on the product and the texture of your concrete.
Texture | |
|---|---|
Smooth | 75-100 |
Fine or Course | 75-100 |
For example, a 1 Unit Kit of E903SL Urethane Slurry covers about 40 sq ft at a thickness of 1/8 inch. A 1/4 Unit Kit covers 10 sq ft at the same thickness. Always check the manufacturer’s guidelines for the specific product you use. These application methods help you achieve optimal results.
Re-application Strategies and Multiple Coats
Sometimes, one application of concrete hardener is not enough. You might need to re-apply it or use multiple coats. This depends on the product, the condition of your concrete, and the level of durability you want. For very porous or old concrete, a second coat can significantly improve performance. It helps the hardener penetrate deeper and create a stronger surface.
If you decide on multiple coats, allow the first coat to dry completely. Check the manufacturer’s instructions for specific drying times between coats. Usually, you apply the second coat in the same way as the first. Make sure you maintain even coverage. This strategy ensures maximum protection and longevity for your concrete floors.
Post-Application Drying, Curing, and Protection
After you apply the concrete hardener, the drying and curing process begins. This is a critical time for the hardener to achieve its full strength. Drying times vary. They depend on the product, temperature, and humidity. Always follow the manufacturer’s recommendations. During this period, keep traffic off the treated area. Protect it from water or other contaminants.
Once the hardener cures, you might want to add an extra layer of protection. Sealing cured concrete provides an additional layer of protection. It improves both its functionality and aesthetic appeal. Although sealing is not part of the initial curing process, it further fortifies the surface against external threats. A good sealer does several things:
It seals surface pores.
It prevents water and chemical penetration.
It enhances appearance with a glossy finish.
It extends lifespan by reducing degradation.
This extra step helps your concrete floors stay in top condition for years.
Common Mistakes to Avoid When Applying Concrete Hardener
You can avoid many problems by knowing common mistakes. Here are some pitfalls to watch out for when you apply concrete hardener:
Incorrect Mixing Ratios: Epoxy is a two-part system (resin and hardener). If you use the wrong ratio or fail to mix thoroughly, you get soft, sticky, or uneven coatings. They will never cure properly.
Applying Under the Wrong Conditions: Temperature and humidity greatly affect epoxy curing. If you apply it in conditions that are too cold, it might not cure. If it’s too hot, it can harden too fast. This leads to roller marks, bubbles, and uneven coatings. High humidity can also mess with adhesion and cause clouding.
Rushing the Installation Process: Rushing can lead to uneven coats, missed steps, or improper curing. On the other hand, working too slowly can cause the epoxy to exceed its pot life. This results in thick, discolored, or unusable product.
Always take your time. Follow the instructions carefully. This helps you get the best results from your concrete hardener application.
You now understand that meticulous preparation, precise application, and diligent post-care are vital for concrete hardener. By following these steps, you get significantly enhanced, long-lasting, and low-maintenance concrete floors. This surface resists dusting, abrasion, and wear, maximizing your investment.
FAQ
How long does concrete hardener last?
Concrete hardener offers long-lasting protection. It can significantly extend your floor’s life. Many applications last for years, even decades, with proper maintenance. You get durable results.
Can I apply hardener to old concrete?
Yes, you can apply hardener to old concrete. First, clean and repair the surface thoroughly. This ensures the hardener penetrates and bonds correctly. You will see great results.
What’s the difference between a hardener and a sealer?
A hardener penetrates concrete, making it denser and stronger. A sealer forms a protective layer on top. You use a hardener for strength, a sealer for surface protection and appearance.
See Also
Maximize Concrete Longevity: 2025 Guide to Floor Hardener Application
Choosing Ideal Concrete Floor Hardeners: A 2025 Selection Guide
Selecting Optimal Concrete Densifiers, Hardeners, and Sealers: Your 2025 Handbook
Liquid Solutions: Concrete Floor Hardener, Sealer, and Densifier Explained
Unveiling the Mechanics: How Concrete Surface Hardeners Function Effectively