
You want durable, dust-free, and attractive concrete floors. Crystal floor hardener offers an effective solution, even for beginners. It boosts durability, stops dust, and enhances appearance. This guide shows you exactly how to apply crystal floor hardener for professional results. With proper preparation, this is a manageable DIY project.
Key Takeaways
Crystal floor hardener makes concrete floors stronger and stops dust. It works by creating new crystals inside the concrete.
Good preparation is very important. You must clean the floor well and fix any cracks before you put on the hardener.
Follow all instructions for mixing and putting on the hardener. This helps your floor look good and last a long time.
Understanding Crystal Hardener
What is Crystal Hardener?
Crystal floor hardener is a special liquid you apply to concrete. It works by reacting with the concrete itself. When you put it on, chemicals like sodium silicate in the hardener mix with things already in your concrete, such as calcium hydroxide. This reaction creates new, non-soluble crystalline structures. These crystals fill up tiny pores, capillaries, and even small cracks in the concrete. This process makes your concrete denser and much stronger. Think of it as giving your floor a super-tough internal skeleton.
Key Benefits for Floors
You choose crystal hardener because it significantly improves your concrete floors. It makes the surface much harder, so it resists wear from foot traffic and machinery. This increased hardness means your floor lasts longer, preventing chips and cracks. A denser surface also makes it harder for liquids to penetrate, which helps prevent stains. Plus, it eliminates dusting, stopping those fine concrete particles from forming and spreading. You get a floor that is more resistant to abrasion and chemical spills.
Types of Floor Hardeners
You will find different types of floor hardeners on the market. The main categories are liquid chemical hardeners and dry shake hardeners. Liquid hardeners, often silicate-based (like sodium or lithium silicates), are what you typically spray or mop onto existing concrete. They penetrate the surface to react. Dry shake hardeners, like metallic or non-metallic aggregates, are broadcast onto fresh concrete and then troweled in. Knowing how to apply crystal floor hardener depends on the type you choose. Other options include epoxy and polyurethane hardeners, each offering unique benefits for specific environments.
Essential Tools and Materials
Before you begin applying crystal floor hardener, gather all your supplies. Having everything ready makes the process smooth and efficient. Here is a comprehensive list of what you will need.
Safety Gear Essentials
Your safety comes first. Always protect yourself when working with chemicals. You will need safety glasses to shield your eyes from splashes. Wear chemical-resistant gloves to protect your hands. A respirator or face mask is also important, especially in poorly ventilated areas, to avoid inhaling fumes. Following these safety precautions helps ensure a smooth project.
Cleaning Supplies
A clean floor is crucial for proper hardener penetration. You will need a heavy-duty degreaser or concrete cleaner to remove dirt and oils. A stiff-bristled brush or a floor scrubber helps with deep cleaning. You also need a wet/dry vacuum or a mop and bucket for rinsing and picking up dirty water.
Application Tools
For applying the hardener, you have a few options. A low-pressure sprayer works well for even distribution over large areas. For smaller spaces or detailed work, a soft broom or a microfiber mop can be effective. If you plan to polish the floor after hardening, you might use professional grinding and polishing machines, grinding equipment, metal bond diamond discs, resin bond diamond discs, and ultra-fine diamond pads.
Measuring and Mixing Tools
Accurate measurement is key for crystal hardener to work correctly. You will need a graduated measuring cup to measure by volume. A flat-edged mixing stick or spatula helps you mix thoroughly. Remember, the ideal temperature for mixing is usually between 70°F and 85°F (21°C to 29°C). Colder temperatures can make the solution thick. Mix for at least three full minutes, scraping the sides and bottom of your container. Inaccurate measuring or incomplete mixing can lead to problems like soft spots.
Your Crystal Hardener Product
Of course, you need the crystal hardener itself! Make sure you have enough product for your entire floor. Check the manufacturer’s instructions for specific coverage rates and any special preparation notes for your chosen hardener.
Step-by-Step Instructions: How to Apply Crystal Floor Hardener
Now you have your tools and understand the product. It is time to learn how to apply crystal floor hardener. These step-by-step instructions will guide you through the entire process. You will achieve a professional finish.
Surface Preparation Essentials
Proper preparation is the most critical step. It ensures the hardener works as it should. Do not skip these steps!
Cleaning and Degreasing
First, clear everything from your floor. You need a completely empty space. Use a leaf blower or broom to remove all dust and debris, especially from corners. A clean surface is vital for the hardener to stick properly.
Next, you must clean the concrete thoroughly. Any prior stains or finishes must be completely dry. Moisture, oils, greases, or uncured finishes can cause problems like fisheyes or curing issues. For deep-set stains, you have specific methods:
Oil and Grease Stains: Apply a commercial degreaser. Scrub it with a stiff brush. Let it soak in, then rinse with hot water. For older stains, try a poultice of baking soda and acetone for several hours.
Rust Stains: Treat these with oxalic acid or a special rust remover.
Organic Stains (like leaves or mildew): Oxygen bleach works well here.
Paint Spills: You will often need a chemical paint stripper. Follow this with pressure washing.
Thorough rinsing is always essential to remove any residue. You can use a power washer for effective cleaning. It removes dirt, mold, mildew, and some stains. Use a pressure washer with 2,500-3,500 PSI. A fan-tip nozzle helps spread the pressure evenly. Hold the wand 12-18 inches from the surface. Be careful! Too much pressure can damage the concrete.
Repairing Imperfections
Inspect your concrete surface carefully. Look for cracks, uneven spots, or old coatings. You need a smooth, even surface for the best results. For repairing imperfections, you can pour a “cap” using polymer-modified Sand Mix. You can also fix individual cracks and uneven spots. Then, apply a thin layer of Flo-Coat over the entire slab. For leveling under new flooring, lower-cost products like Sakrete Floor Mud work too.
If you have rough areas, grinding helps. Attach a diamond grinding wheel to a concrete grinder. Maintain a consistent speed for an even finish. Use a vacuum or dust collector to manage dust. Grinding removes contaminants and roughens the surface. This enhances mechanical adhesion for your hardener. After grinding, vacuum or hose to remove dust.
Ensuring Floor Dryness
Your floor’s moisture level is crucial. For liquid concrete hardeners, the surface should not be visibly wet. However, it should still be slightly damp. This allows for effective penetration. If your surface is too dry, lightly spray it with water. Just moisten it; do not make it excessively wet.
Masking Adjacent Areas
Protect anything you do not want the hardener on. Use masking tape to create clean edges. High-adhesion masking tape resists bleed-through. It also removes cleanly after curing. Cover walls, sidewalks, and equipment with plastic sheeting or drop cloths. This prevents spills or overspray. Remember to remove tape and sheeting promptly once the hardener cures. This avoids residue or tearing.
Mixing the Hardener Correctly
Accurate mixing is key to how to apply crystal floor hardener successfully.
Reading Manufacturer’s Instructions
Always start by reading the manufacturer’s instructions for your specific product. They provide the exact details you need.
Achieving Correct Dilution
First, determine how much hardener you need. Calculate the total volume of mixed material. If you need more, you can mix a second batch. The manufacturer’s instructions will tell you the specific mixing ratio. This might be 1:1, 2:1, or 3:1. You can measure accurately by volume. Pour equal amounts of resin and hardener into a plastic mixing cup with clear graduations. For example, if you need 10oz total for a 1:1 ratio, pour 5oz of resin and 5oz of hardener. You can also measure by weight using a digital scale.
Proper Mixing Techniques
The ideal working temperature for most hardeners is 70-85°F (23-30°C). Cold temperatures (below 68°F) can make the solution thick. This can cause micro-bubbles and slow curing. If your bottles are cold, warm them in a water bath. Make sure to dry them carefully before opening. Higher temperatures will speed up the reaction. This reduces your working time.
Now, you need to mix resin with hardener. Pour the resin first, then the hardener, into a large, clean mixing cup. Mix for a minimum of 3 minutes. Scrape the sides and bottom thoroughly as you stir. This ensures thorough blending for a proper chemical reaction. Be careful, large amounts can generate excessive heat. Do not mix more than a gallon at a time. After the initial mix, pour the mixture into a second clean container. Scrape the sides and bottom of the first cup. Mix resin with hardener again in the second container for an additional 3 minutes. Do not exceed 8-10 minutes of total mixing time. The epoxy will start to cure if you mix too long. A cloudy appearance means you have incomplete mixing. You want a uniform, clear mixture.
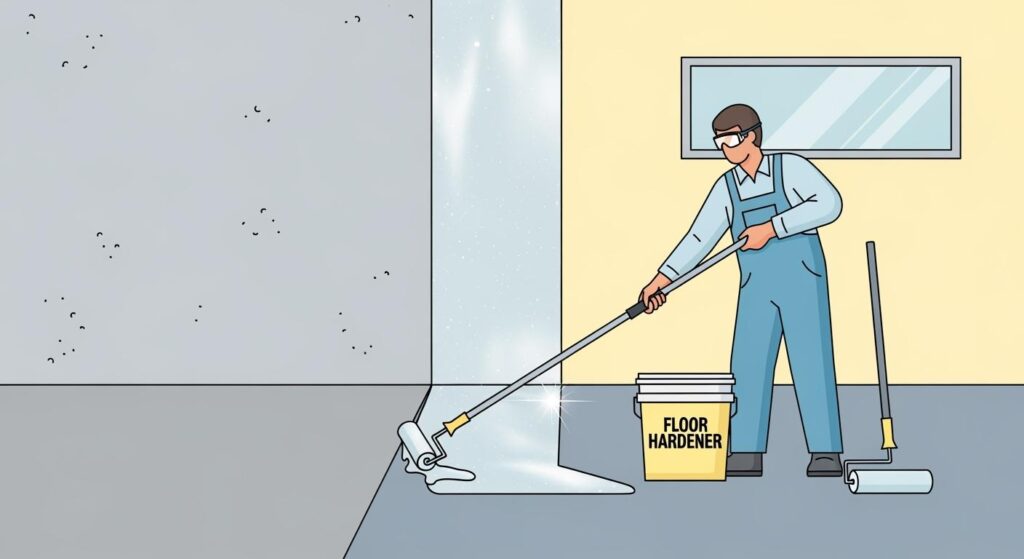
Applying the First Coat Evenly
This is where your preparation pays off.
Choosing Application Method
You have options for applying the hardener. A low-pressure sprayer works well for large areas. It gives you even distribution. For smaller spaces or detailed work, a soft broom or a microfiber mop can be effective.
Techniques for Even Distribution
Pour the mixture directly onto the surface. You can pour it in a zigzag pattern. Then, distribute it evenly with a squeegee or brush. Spread it until you achieve the desired thickness. Allow the hardener to flow over edges if needed.
Avoiding Puddles
It is important to avoid puddles. Spread any excess material immediately. Puddles can lead to uneven curing or a patchy finish.
Ensuring Hardener Penetration
The hardener needs to get into the concrete.
Spreading with Brush or Mop
After applying, use a microfiber applicator, soft broom, or mop to spread the hardener. This helps it penetrate the surface. Ensure the concrete surface is clean and free of dust or debris before application. For sprayable hardeners, use a low-pressure sprayer for a smooth, even layer. Spread any excess with your applicator.
Keeping Surface Wet
For some hardeners, you need to keep the slab wet. Flood the floor with the material. Then, mechanically scrub it. Keep the slab wet for about 20-30 minutes. Do this until gelling begins. After that, rinse and squeegee off any excess. Always check your product label for specific instructions.
Second Coat and Curing Process
You are almost done!
When a Second Coat is Needed
Check the product label. Some hardeners require a second coat for optimal performance.
Applying Subsequent Coats
If you need a second coat, apply it 4-10 hours after the initial pour. The resin should still be tacky. If more than 10 hours pass, scuff the surface with 1000 grit sandpaper. Then clean it before reapplying.
Understanding Curing Times
Curing time varies by product and temperature. Crystal-Bond 1 develops significant properties in 1 hour. However, a full cure needs 4-6 hours at 77°F (25°C) for fully matured bonds. Epoxy resin typically cures in 48-72 hours at 75-85°F (24-30°C). High temperatures speed up curing. For example, resin cures in 50 minutes at 70°C. Lower temperatures slow the process. Each degree decrease below 72°F (22°C) can extend hardening time by 15-25%.
Protecting During Curing
Allow the hardener to cure undisturbed. Keep the area clean and dust-free. It will be dry to the touch in about 12 hours. Full cure can take up to 7 days, depending on the product.
Troubleshooting Common Issues
Even with the best preparation, you might encounter some issues. Do not worry! You can fix most common problems.
Uneven Application and Streaks
You might see cloudy streaks or sticky spots on your floor. This often happens if you do not mix the hardener enough. When resin and hardener are not fully combined, cloudy streaks remain. This leads to an improper cure and potentially sticky resin. Also, stirring too vigorously can introduce too much air. This results in a frothy, cloudy resin with many bubbles. You might also notice uneven streaks and wrinkles. This occurs if the coating does not level properly. High viscosity, incorrect solvent, inadequate mixing, or exceeding the usable time limit for two-component coatings after mixing can cause this.
Hardener Not Penetrating
If your hardener is not soaking in, check a few things. Your surface might be too dry. Lightly mist it with water to help absorption. You might also be using the wrong product for your concrete type. Always double-check the manufacturer’s recommendations. Applying the hardener too thickly can also prevent proper penetration. Spread it thinly and evenly.
Dealing with Excess Product
You need to handle excess product carefully. Clean up spills with a scraper. Collect as much material as possible. Then, follow up with paper towels. For large spills, contain them using sand, clay, or other inert, absorbent materials. Do NOT use sawdust or other fine cellulose materials. You can reclaim uncontaminated hardener for future use. Clean hardener residue with warm, soapy water. Never combine hardeners with sawdust, woodchips, or other cellulose materials. The reaction can generate heat and cause a fire. To dispose of liquid hardener, puncture a corner of the can. Drain the residue into a new container. Avoid disposing of resins or hardeners as liquids. Instead, mix small quantities of waste resin and hardener. Allow them to cure into an inert solid.
Safety During and After Application
Always prioritize safety. During crystal hardener application, mix resin and hardener slowly. This prevents bubbles and splashes. Avoid eating or drinking in your workspace. Keep resin off your skin. Refrain from touching your face. These simple safety precautions protect you. After finishing the application, remember to clean up any spills. Use paper towels and a small amount of rubbing alcohol. Wash your hands thoroughly, even if you wore gloves. Dispose of leftover resin and mixing cups according to local regulations. Never pour resin down the drain. Following these safety precautions ensures a safe project.
Maintenance and Longevity
You want your newly hardened floor to last a long time. Proper care helps you maximize its lifespan. Follow these simple steps to keep your floor looking great and performing well.
Initial Cleaning After Curing
Once your floor fully cures, you can take the first steps to clean it. If you have any drips or excess hardener, you can sand them off. You can clean your tools and surfaces with Isopropyl Alcohol 99% or a residue-free cleaner. Do not use soap and water for this initial cleaning. If you notice imperfections after curing, you can sand and polish the resin. Start sanding with fine-grit sandpaper, around 400 grit. Then, move to finer grits, up to 1000 or 2000 grit. This removes rough patches or bubbles. For larger projects, you might need a hand tool for sanding. After sanding, use a resin polish or a soft cloth to buff the piece. This restores its clear, glossy appearance.
Routine Cleaning Practices
Keeping your hardened floor clean is simple. Different floor types have specific cleaning needs:
Floor Type | Dry Cleaning | Wet Cleaning |
|---|---|---|
Sealed Concrete Floors | Sweep or vacuum regularly to remove loose dirt and debris. | Mop with a pH-neutral cleaner and water. Avoid harsh chemicals that can damage the sealer. |
Stained Concrete Floors | Dust mop daily to prevent scratching. | Use a damp mop with a mild cleaner. Test in an inconspicuous area first. |
Polished Concrete Floors | Use a microfiber mop or an auto scrubber with polishing pads for daily maintenance. | Clean spills immediately. Use only water or a specialized polished concrete cleaner. Avoid acidic or abrasive cleaners. |
You should sweep or vacuum daily, especially in high-traffic areas. Use a dust mop or a vacuum designed for hard surfaces. This prevents debris accumulation. Mop weekly or bi-weekly, depending on foot traffic. Use a microfiber mop head and a pH-neutral cleaner mixed with warm water. Make sure you wring out excess water. This avoids oversaturating the concrete.
When to Reapply Hardener
Crystal floor hardeners offer long-lasting protection. However, they do not last forever. You might need to reapply hardener after many years. Look for signs of wear. You might notice increased dusting or a reduction in the floor’s original shine. If your floor starts to absorb liquids more easily, it could be time for a new application. Always check the manufacturer’s recommendations for reapplication intervals. This helps you maintain optimal performance.
You now know how to apply crystal floor hardener for incredible durability, dust reduction, and a beautiful floor! You mastered:
Thorough preparation
Precise mixing
Careful application
Proper curing You can confidently achieve a professional-grade finish. Enjoy your long-lasting, easy-to-maintain, and stunning floor!
FAQ
❓ How long does crystal floor hardener last?
You can expect your hardened floor to last many years! Its lifespan depends on traffic and maintenance. Reapplication might be needed after 5-10 years.
🎨 Can you apply crystal hardener over painted concrete?
No, you cannot. You must remove all paint or coatings first. The hardener needs to penetrate bare concrete to work correctly.
🌈 Does crystal hardener change the concrete’s color?
Typically, no. Crystal hardener is clear. It enhances the natural look of your concrete. It might slightly deepen the existing color.
See Also
Maximize Concrete Longevity: A 2025 Guide to Floor Hardener Application
Choosing the Ideal Concrete Floor Hardener: Your 2025 Selection Handbook
2025 Comparative Guide: Selecting the Optimal Floor Hardener for Your Needs
Understanding Concrete Floor Hardeners: Their Purpose and Operational Mechanics
Liquid Concrete Solutions: Hardener, Sealer, and Densifier Explained